Quantcast
Channel: TMS Software
Viewing all 1008 articles
Browse latest View live

TMS Day followup: Using TMS FlexCel with TMS WEB Core

$
0
0

Another TMS day

They say time flies when you are having fun... It is hard to believe it has been about 2 years since my last blog post, which was also about a TMS Day. I see two options here: Either we start doing more TMS Days so I can blog about the sessions, or I just start actually writing down more stuff.

On my discharge I'd like to say that I haven't been completely silent this 2 years: I've been writing the stuff I would normally write in a blog post in the "Tips and Tricks" on FlexCel docs. Ok, this is a poor excuse, but an excuse anyway and I have nothing better so I'll stand by it.

Now, it is time to go back to the TMS Day. As always, it was a great experience to be there and speak face to face with customers and sharing experiences . Me sitting here and writing a blog post just isn't the same. And to be brutally honest, speaking with the people did change my mind, and this is not just something I am saying because it sounds nice. When I arrived to the TMS Day I saw WEB Core as an interesting technology, but I saw little connection with it and the FlexCel reporting stuff, which is what I do. Reporting is normally a server-side thing, to be done on the server where the database is, and not something you would do normally client-side in javascript. So, there is little to integrate: you can call FlexCel from WEB Core, but you can call any other reporting solution too. You can also use WEB Core with FlexCel, but you can use any other web solution with FlexCel too. When I arrived, this use case (WEB Core in the client, reports with FlexCel in the server) was the only one I had in mind. When I was there, I spoke with a lot of people and learned about a lot of new use cases I hadn't even thought about. When I left, I had a lot of more plans for a deeper integration. But more on that below.

FlexCel as a server side solution for reporting

We started the session with a very basic description of what FlexCel does. As usual, this was a very packed session and I had only half an hour, so I didn't wanted to waste a lot of time explaining what FlexCel did. We just covered the basics: With FlexCel you create Excel files either with code or by writing tags in an Excel template, and then you can export those files to pdf or html. While we use Excel as a building block for the report, it is not needed to have the result in Excel. And as this session was all about the web, we just created pdf and html reports.

1. A simple report

Some time ago I read about a really interesting project on where they used a raspberry pi to record how many times a day a baby would say the word "why". Being a father of a little 4 year old myself, I was very interested in the experiment and I thought it could be an interesting real world example on something that needed reporting. At the same time, with me also being lazy and with more stuff to do than I could possibly finish in five lives, I decided that instead of actually recording my child, I would just create a small database with my own estimates on how many times she would pronounce the word.

I ended up with an access database that looked like this:


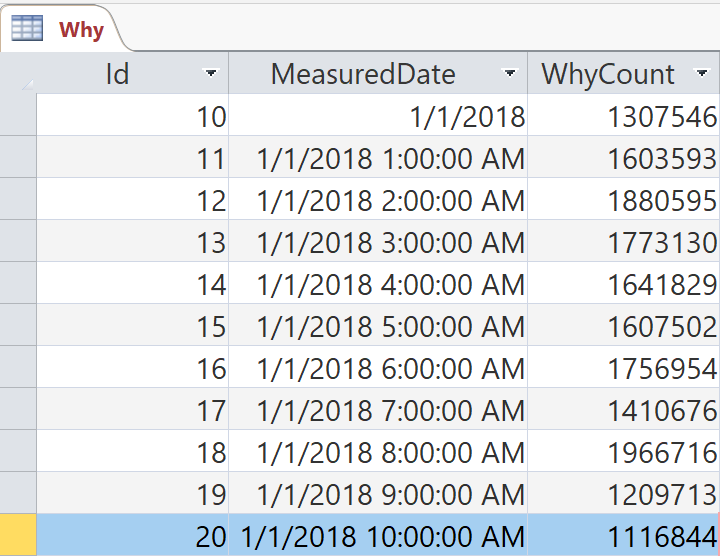
Yes, it was in Access, and you wouldn't use Access for a real application. Bit for a demo, it is fine to me. Just remember to use a real database in real applications.

The next step was creating two different applications. Since TMS WebCore runs on the client (javascript) and FlexCel is a server side product which runs in the server (delphi), I needed to create both a TMS webcore app for the client, and a Delphi WebBroker app for the server.

1.1. Server side

Server side we created a new WebBroker app by going to File->New->Other... then choosing "WebBroker" in the left panel and "Web Server Application" in the right.

The focus on this session wasn't in how to create a FlexCel report or a WebBroker app, so I just used a pre-made example which you can download at the end of this post.

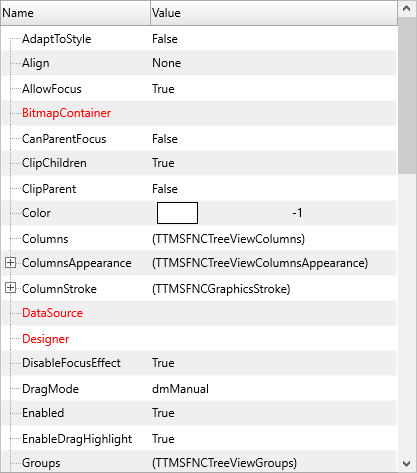
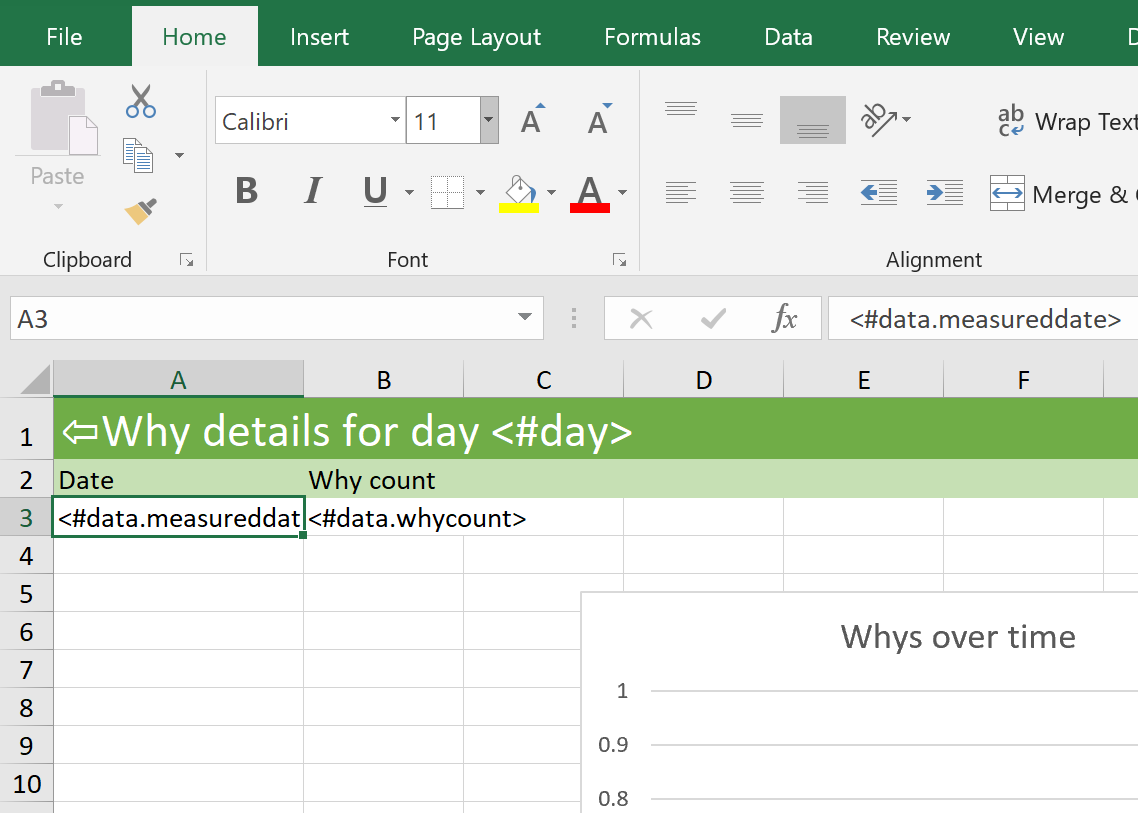
For the Excel report I just created an Excel file that looked like this:


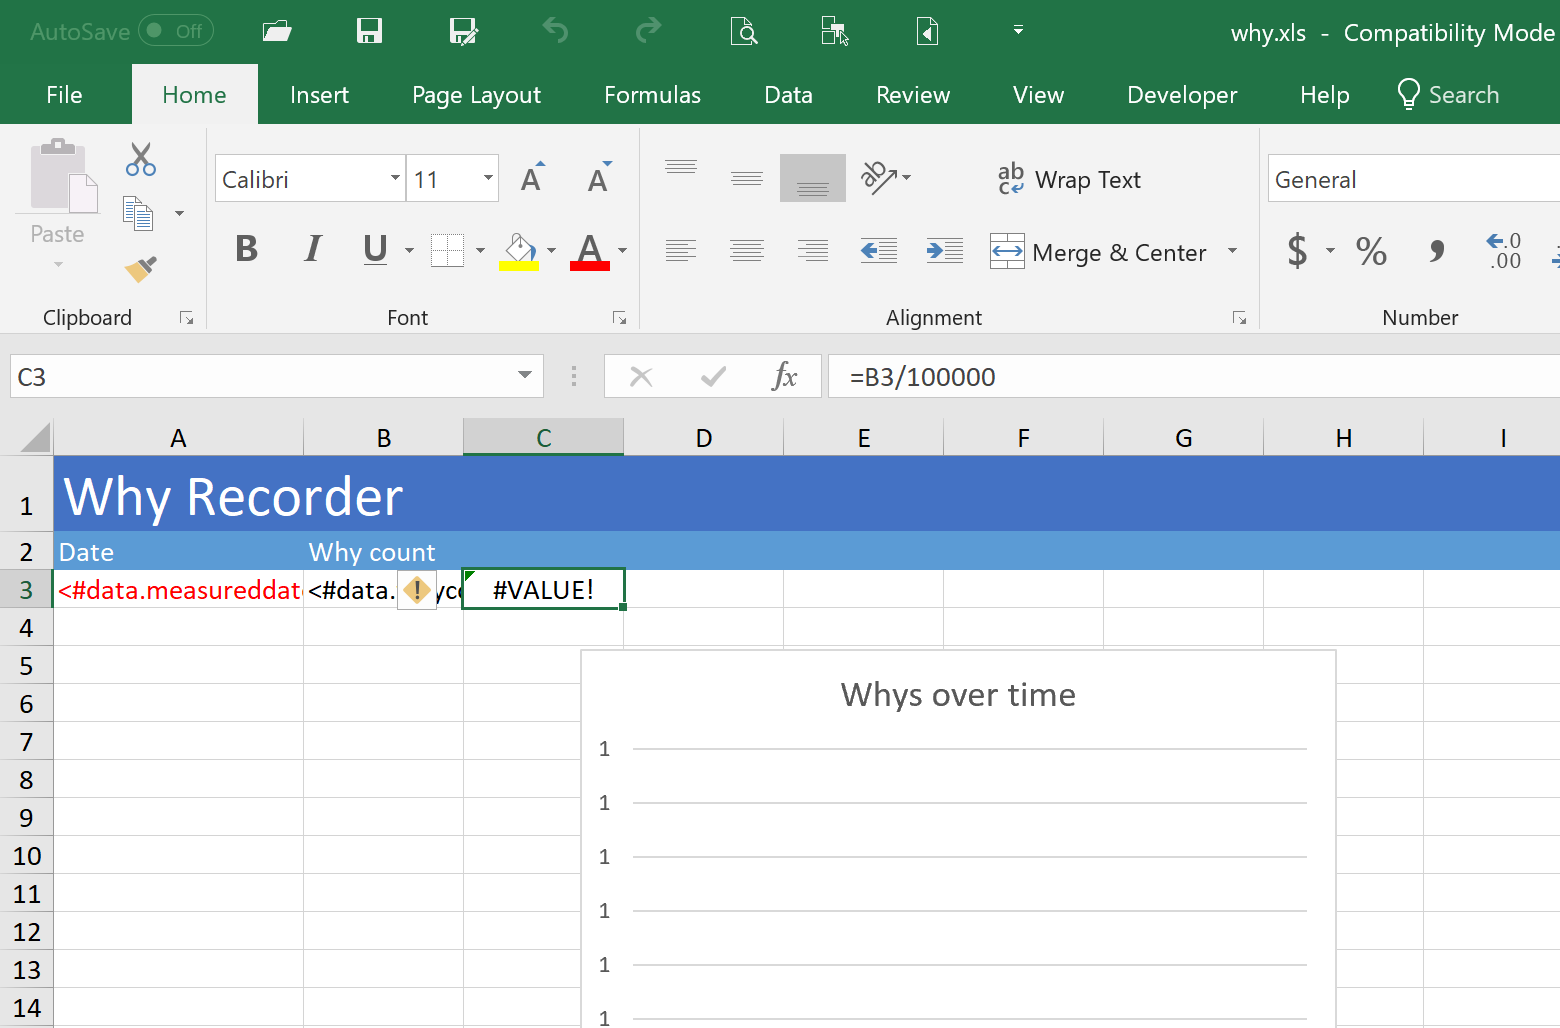
I just wrote tags with the database fields (like <#data.measureddate>) in cells A3 and B3, then defined a name where the report would run and added a chart as to make it a little more interesting. Note: Right now FlexCel renders only charts in xls files to pdf and html, and while we are working in fully supporting xlsx this is not yet ready. So this is why I used an xls file instead of an xlsx.

I also added some conditional formatting just for fun:


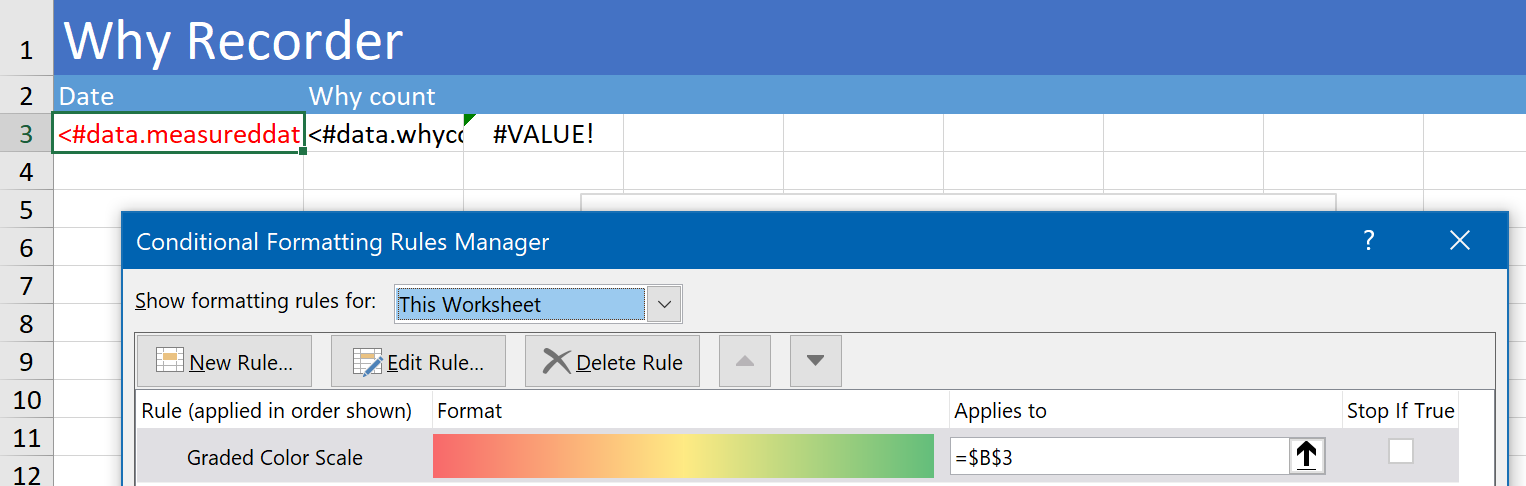
After all, one of the nicest parts of doing reports in FlexCel is that you get access to all those simple features in Excel like conditional formats, tables or charts, so why not to use them? Even if in a case like this, I am not generating Excel files at all, only pdfs and html files. That was all I did in the template. Then in the Webbroker app, I added a datamodule to access the database, and the following code to the DefaultHandlerAction event:
procedure TWebModule1.WebModule1DefaultHandlerAction(Sender: TObject;
  Request: TWebRequest; Response: TWebResponse; var Handled: Boolean);
var
  Report: TFlexCelReport;
  Xls: TExcelFile;
  Ts: TMemoryStream;
  Pdf: TFlexCelPdfExport;
begin
  Report := TFlexCelReport.Create(true);
  try
    Report.AddTable('data', datamodule1.data);

    Xls := TXlsFile.Create('....why.xls', true);
    try
      Ts := TMemoryStream.Create();
      try
        Report.Run(Xls);
        Pdf := TFlexCelPdfExport.Create(Xls, true);
        try
          Pdf.BeginExport(Ts);
          Pdf.ExportSheet;
          Pdf.EndExport;
        finally
          Pdf.Free;
        end;

        Response.SendStream(Ts);
      finally
        Ts.Free;
      end;
    finally
      Xls.Free;
    end;
  finally
    Report.Free;
  end;

This basically adds the datasource "datamodule1.data" to the report, then runs the report and then exports it to pdf, sending the pdf bytes to the Response of the html app. If you now run the application, and press the "Open Browser" app in the Webbroker form, you should see something like this:


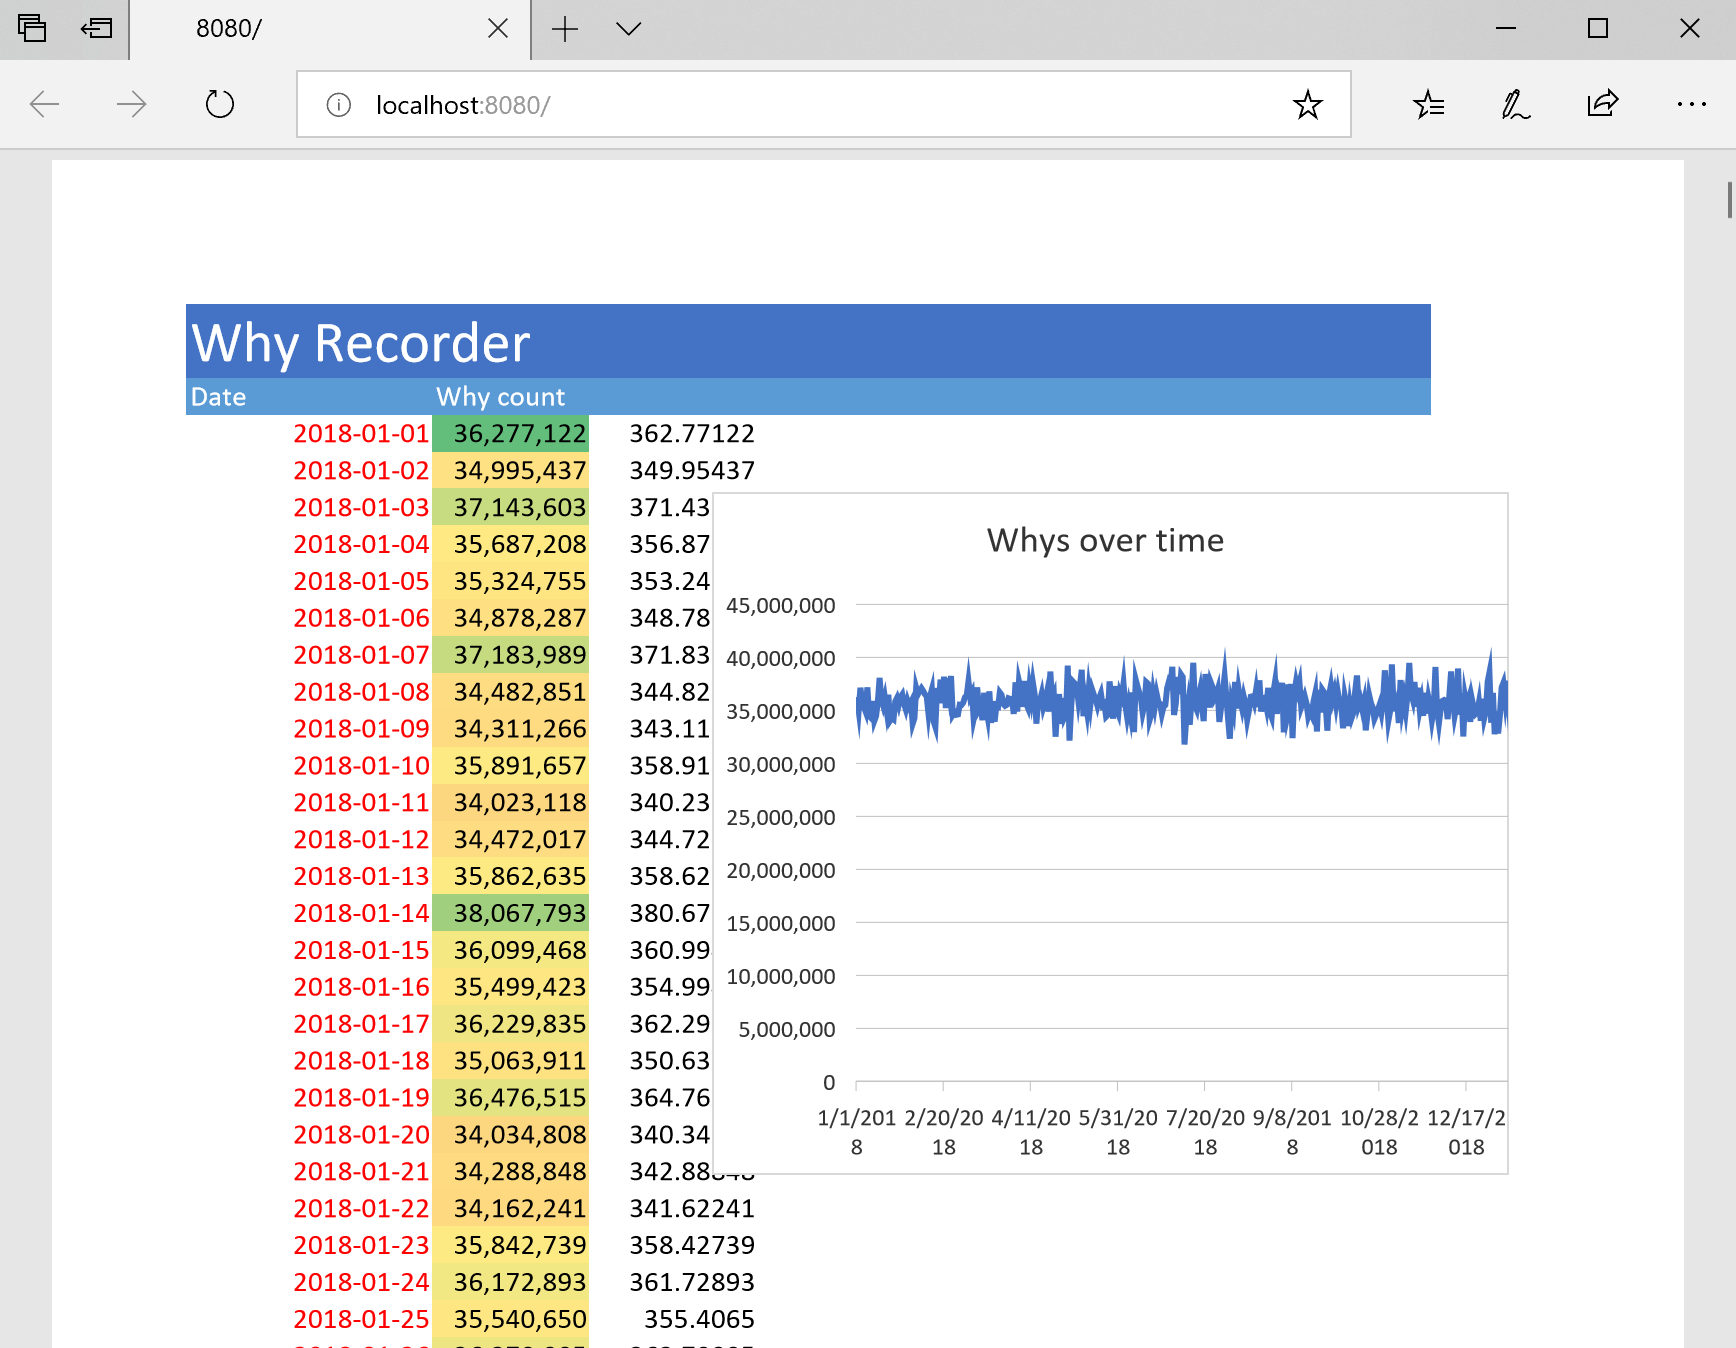
Note that until here, we haven't used TMS WebCore at all. This is just a server side app which runs a report over a database, and returns a pdf when you call it. Note also how we got the conditional formatting we wrote in the template for column B shows in the final report, and the chart is filled with data.

1.2. Client Side

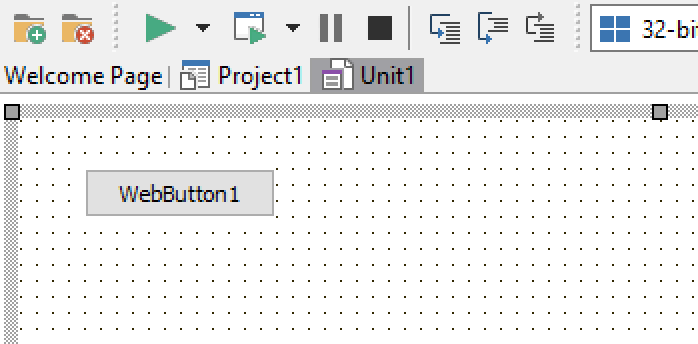
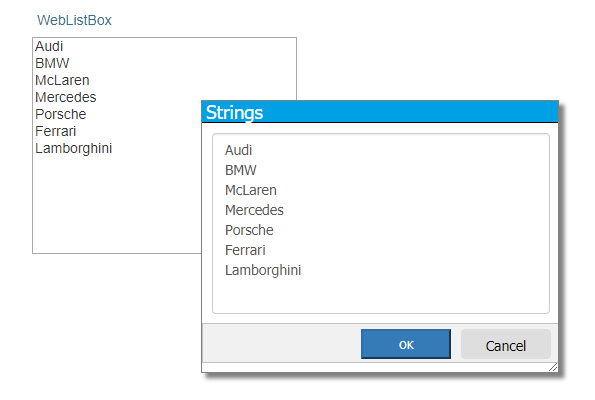
Ok, now what about the client side? Imagine we have a TMS WebCore app, and we want to show the report when an user clicks a button on it. How do we call the server app we coded just moments ago?

To answer the question, we will create a new TMS WebCore application, and drop a WebButton:


Then, we double click the button, and write the following code:
uses ... Web,...;
...
procedure TForm1.WebButton1Click(Sender: TObject);
begin
    window.open('http://localhost:8080');
end;
And that should be it! Now when you run the tms WebCore application and press the button, it should open the report. Note that of course the server must be running and listening in localhost:8080 for this to work.

2. A more complex integration

In the previous section we saw a very simple example on how to integrate reporting in WebCore. There was basically no integration between WebCore and FlexCel, and all the above can be resumed in the lines:
uses ... Web,...;
...
procedure TForm1.WebButton1Click(Sender: TObject);
begin
    window.open('http://localhost:8080');
end;
You could have used any other reporting solution here instead of FlexCel, and just have a webserver app exposing the reports as html or pdf. It doesn't get any simpler than this, and I believe this is a good thing. Calling window.open will probably be the most used way to show reports from a WebCore app.

But what if we wanted a little more integration? Well, you can do that too, and this is what we covered in the second demo. As for the first demo we had used PDF, on this second demo we will be showing HTML reporting. And while we could call the html reports also with window.Open as in the first case, here we want to integrate the report inside the TMS WebCore app.

2.1. Server Side

Server side, we are going to use the same template that we used in the first example, but export to HTML instead of PDF. We will use a FlexCelHTMLExport class instead of a FlexCelPDFExport class.

We are also going to embed the images in the HTML file (using HTML5) so we don't have to feed separated images and html to the html component that is going to display the report client side. We are also going ot set the image resolution to 192 dpi so the chart looks crisp in the generated file.
procedure TWebModule1.WebModule1DefaultHandlerAction(Sender: TObject;
  Request: TWebRequest; Response: TWebResponse; var Handled: Boolean);
var
  Report: TFlexCelReport;
  Xls: TExcelFile;
  Ts: TMemoryStream;
  Writer: TStreamWriter;
  Html: TFlexCelHtmlExport;
begin
  Report := TFlexCelReport.Create(true);
  try
    Report.AddTable('data', datamodule1.data);

    Xls := TXlsFile.Create('......why.xls', true);
    try
      Ts := TMemoryStream.Create();
      try
        Writer := TStreamWriter.Create(Ts, TEncoding.UTF8);
        try
          Report.Run(Xls);
          Html := TFlexCelHtmlExport.Create(Xls, true);
          try
            Html.HtmlVersion := THtmlVersion.Html_5;
            Html.EmbedImages := true;
            Html.ImageResolution := 192;
            Html.Export(Writer, 'report.html', nil);
          finally
            Html.Free;
          end;

          Response.ContentStream := Ts;
        finally
          Writer.Free;
        end;
      finally
      //don't free the content stream
       // Ts.Free;
      end;
    finally
      Xls.Free;
    end;
  finally
    Report.Free;
  end;

2.2. Client Side

We are going to create a new TMS WebCore application, drop a button, a WebHTMLContainer, and a WebHTTPRequest component:


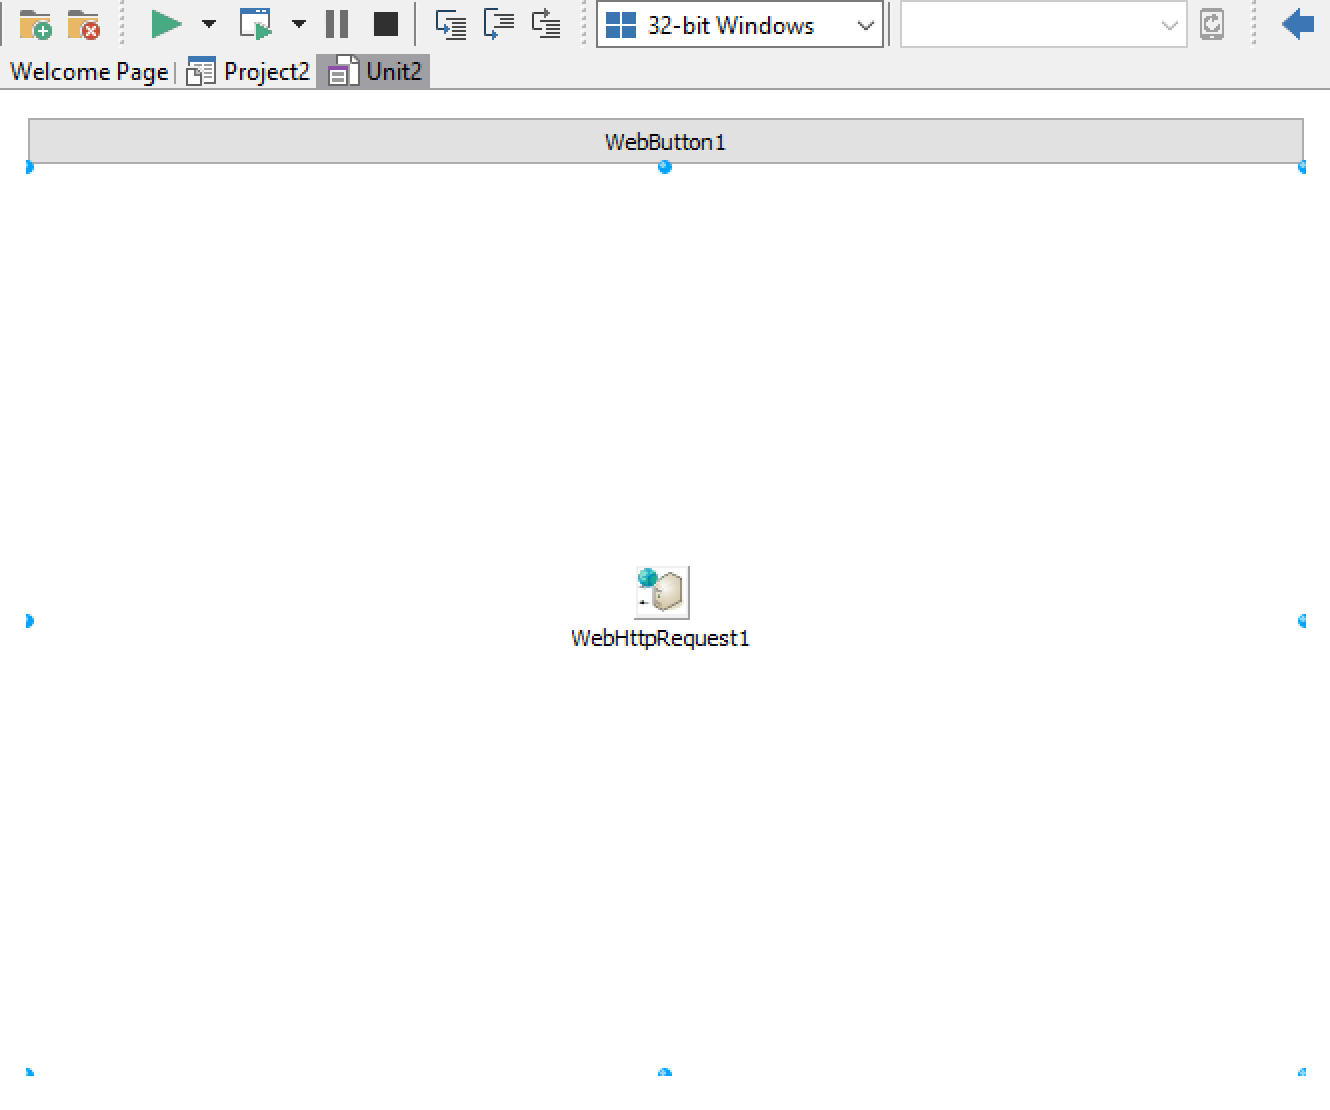
This time we are going to use the WebHTTPRequest component to get the report. WebHTTPRequest is async, so we need to call it from the button click event, and then when the answer data is available, load it into the WebHTMLContainer. The first step then is to set the server address in the WebHTTPRequest properties:


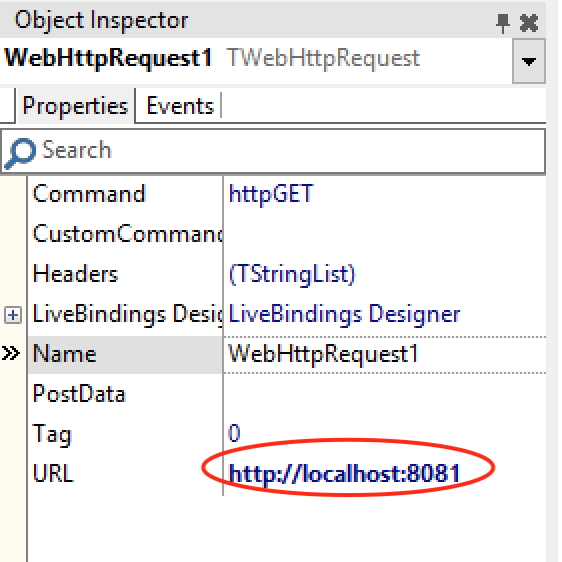
Note that for this example we will use port 8081 instead of 8080 as in our last example, so we can run both at the same time. This means that we also need to change our server app to serve in port 8081 instead of 8080.

Then, on the button click event let's call the WebHTTPRequest, and let's also write the Response event of the WebHTTPRequest so it fills the WebHTMLContainer with the data:
procedure TForm1.WebButton1Click(Sender: TObject);
begin
  WebHttpRequest1.Execute;
  WebButton1.Enabled := false;
end;

procedure TForm1.WebHttpRequest1Response(Sender: TObject; AResponse: string);
begin
  WebButton1.Enabled := true;
  ShowMessage('Ok!');
  WebHTMLContainer1.HTML.Text := AResponse;
end;

A last note. At the time of this writing, TWebHTMLContainer doesn't have a property to change how it handles overflow. But as TMS WebCore allows full control on the generated html and css, we are going to apply a little hack to make the WebHTMLContainer scrollable. We will edit the Project2.html file, and add the following to the head section:
    <style type="text/css">
    #TForm1_HTMLContainer1 {overflow: visible!important}
    </style>
This line will allow the container to scroll, and as it is defined as !important, it should overwrite other rules that make the container not to scroll. This should be just a temporary hack, until the WebHTMLContainer gets a property that allows you to manipulate this directly.

So after all of this, it is time to run the application! And we get...


CORS

What was that error? Everything was going so well! But let's not panic: The problem here is with something called Cross-Origin Resource Sharing (CORS) Basically, we are trying to access a resource in the server (localhost 8081) from the client (localhost 8000) and this is not allowed by default. We need to specifically allow requests from localhost 8000 into the server.

And you allow the requests by setting the headers Access-Control-Allow-Origin and Access-Control-Allow-Headers

The full code in the server should now be:
procedure TWebModule1.WebModule1DefaultHandlerAction(Sender: TObject;
  Request: TWebRequest; Response: TWebResponse; var Handled: Boolean);
var
  Report: TFlexCelReport;
  Xls: TExcelFile;
  Ts: TMemoryStream;
  Writer: TStreamWriter;
  Html: TFlexCelHtmlExport;
  HtmlState: TPartialExportState;
begin  
  Response.SetCustomHeader('Access-Control-Allow-Origin', '*');
  Response.SetCustomHeader('Access-Control-Allow-Headers', 'X-Custom-Header, Cache-Control');

  Report := TFlexCelReport.Create(true);
  try
    Report.AddTable('data', datamodule1.data);

    Xls := TXlsFile.Create('......why.xls', true);
    try
      Ts := TMemoryStream.Create();
      try
        Writer := TStreamWriter.Create(Ts, TEncoding.UTF8);
        try
          Report.Run(Xls);
          Html := TFlexCelHtmlExport.Create(Xls, true);
          try
            Html.HtmlVersion := THtmlVersion.Html_5;
            Html.EmbedImages := true;
            Html.ImageResolution := 192;
            HtmlState := TPartialExportState.Create(TFlexCelWriter.Null, '');
            try
              Html.Export(Writer, 'report.html', nil);
            finally
              Html.Free;
          end;

          Response.ContentStream := Ts;
        finally
          Writer.Free;
        end;
      finally
      //don't free the content stream
       // Ts.Free;
      end;
    finally
      Xls.Free;
    end;
  finally
    Report.Free;
  end;

end;

With this fixed, we should now see the application working with the report embedded inside it:


3. Even more integration

We didn't got to cover this section in the TMS day, as it was already too much to say for 30 minutes, but I would like to mention it here anyway. The last example (the "integrated" one) does work, but it is not really ok. It is embedding a full HTML document (the one created by FlexCel) inside another HTML document (the TMS WebCore app), and that is not valid HTML. We could have used an iframe instead, but iframes are so ridden with security issues that it might be a solution worse than the problem.

To do a nice integration, we need to separate the HTML headers from the body. Luckily FlexCel HTML exporting was designed from the start to allow you to get the different parts of the html document so you can integrate the HTML output in your site.

3.1. Server Side

On the FlexCel side, we need to use a TPartialExportState object instead of writing directly to an html file. TPartialExportState allows us to get the different parts of a report instead of the full text.

The next thing is that while we want to separate the css from the html so we can write them in different places in the client, we would like to keep everything inside a single request to the server. So we will be sending an encoded response, where the first part is the css, then we have a 4-char 0 separator, and then we have the html. Client side, we will separate this response back to the 2 original parts, and write them in the correct places.

So server side, the code ends up as follows:
procedure TWebModule1.WebModule1DefaultHandlerAction(Sender: TObject;
  Request: TWebRequest; Response: TWebResponse; var Handled: Boolean);
var
  Report: TFlexCelReport;
  Xls: TExcelFile;
  Ts: TMemoryStream;
  Writer: TStreamWriter;
  Html: TFlexCelHtmlExport;
  HtmlState: TPartialExportState;
begin
  Response.SetCustomHeader('Access-Control-Allow-Origin', '*');
  Response.SetCustomHeader('Access-Control-Allow-Headers', 'X-Custom-Header, Cache-Control');

  Report := TFlexCelReport.Create(true);
  try
    Report.AddTable('data', datamodule1.data);

    Xls := TXlsFile.Create('......why.xls', true);
    try
      Ts := TMemoryStream.Create();
      try
        Writer := TStreamWriter.Create(Ts, TEncoding.UTF8);
        try
          Report.Run(Xls);
          Html := TFlexCelHtmlExport.Create(Xls, true);
          try
            Html.HtmlVersion := THtmlVersion.Html_5;
            Html.EmbedImages := true;
            Html.ImageResolution := 192;
            HtmlState := TPartialExportState.Create(TFlexCelWriter.Null, '');
            try
              Html.PartialExportAdd(HtmlState, 'report.html', '', true);
              //We will encode the css and body in the same Response.
              HtmlState.SaveCss(Writer);
              Writer.Write(#0#0#0#0); //Use 4 character 0 as separator between CSS and Body.
              HtmlState.SaveBody(Writer, 1, '');
            finally
              HtmlState.Free;
            end;
          finally
            Html.Free;
          end;

          Response.ContentStream := Ts;
        finally
          Writer.Free;
        end;
      finally
      //don't free the content stream
       // Ts.Free;
      end;
    finally
      Xls.Free;
    end;
  finally
    Report.Free;
  end;

end;
This code will output the css , then the separator #0#0#0#0, then the html.

3.2. Client Side

Client side, we need to re-separate the css and the html, then output the html into the Text of the WebHTMLContainer, and the css into the header of the page.

To output the html, we will use the same code as in the last example. To output the css, we will use the method AddInstanceStyle in TControl. Since this method exists only in web controls but not in normal Win32 controls, we need to write the method inside {$IFNDEF Win32} defines.

There is one last issue to address: FlexCel returns the full css including the enclosing <style> and </style> tags. But AddInstanceStyle expects the inner HTML without the <style> tags. So for this example, we just had to do some poor man's parsing and manually remove the <style> and </style> tags in the css returned by FlexCel. This should not be necessary in the future, since for FlexCel 6.20 we are adding a new overload TPartialExportState.SaveCss which has a parameter includeStyleDefinition. Once we release 6.20, you will be able to just call SaveCss with includeStyleDefinition = false, and there will not be a need to remove it manually to call AddInstanceStyle.

So finally, the code in the client ends up like this:
procedure TForm1.WebHttpRequest1Response(Sender: TObject; AResponse: string);
var
 cssPos: integer;
 cssString: string;
 innerCssStart, innerCssEnd: integer;
begin
  WebButton1.Enabled := true;
  cssPos := Pos(#0#0#0#0, AResponse);
  if (cssPos < 1) then
  begin
    ShowMessage('Invalid response from server');
  end
  else
  begin
      ShowMessage('Ok!');
  end;

  WebHTMLContainer1.HTML.Text := copy(AResponse, cssPos + 4, Length(AResponse));
  cssString := copy(AResponse, 1, cssPos - 1);
  innerCssStart := pos('>', cssString) + 1;
  innerCssEnd := pos('', cssString);
  {$IFDEF WIN32}
  ShowMessage(copy(cssString, innerCssStart, innerCssEnd - innerCssStart));
  {$ELSE}
  WebHTMLContainer1.AddInstanceStyle(copy(cssString, innerCssStart, innerCssEnd - innerCssStart));
  {$ENDIF}
end;

With this code, the document should be a valid html document, with the css in the header and the html for the report inside the div. The results will look similar as in example 2, but the html is now correct.

4. Hyperlinks

Ok, why stop now? There is still so much to cover! But well, I only had 30 minutes to speak so in the TMS day I stopped in the second demo. In this post we have a little more time, so I'll cover one big pink elephant in the room I managed to ignore up to now: Hyperlinks.

HTML is supposed to be about hyperlinks, it is right there on the first "H" in HTML. Wouldn't it be cool if we could add hyperlinks to our reports? I will answer this for you: indeed it would be cool. We could do for example a drill down report where we list the whys per day as in the previous examples, but when you click on a date, you can see a detail on how the whys evolved during that day. And this is exactly what we are going to try to do in this part.

4.1. Server Side

Server side, we will have to modify our template, and add a new one for the details. We will rename why.xls to why-master.xls, and add an hyperlink at cell A3. The hyperlink will have as target the URL:

http://tmsexample.com/detail?day=*.data.measureddate.*


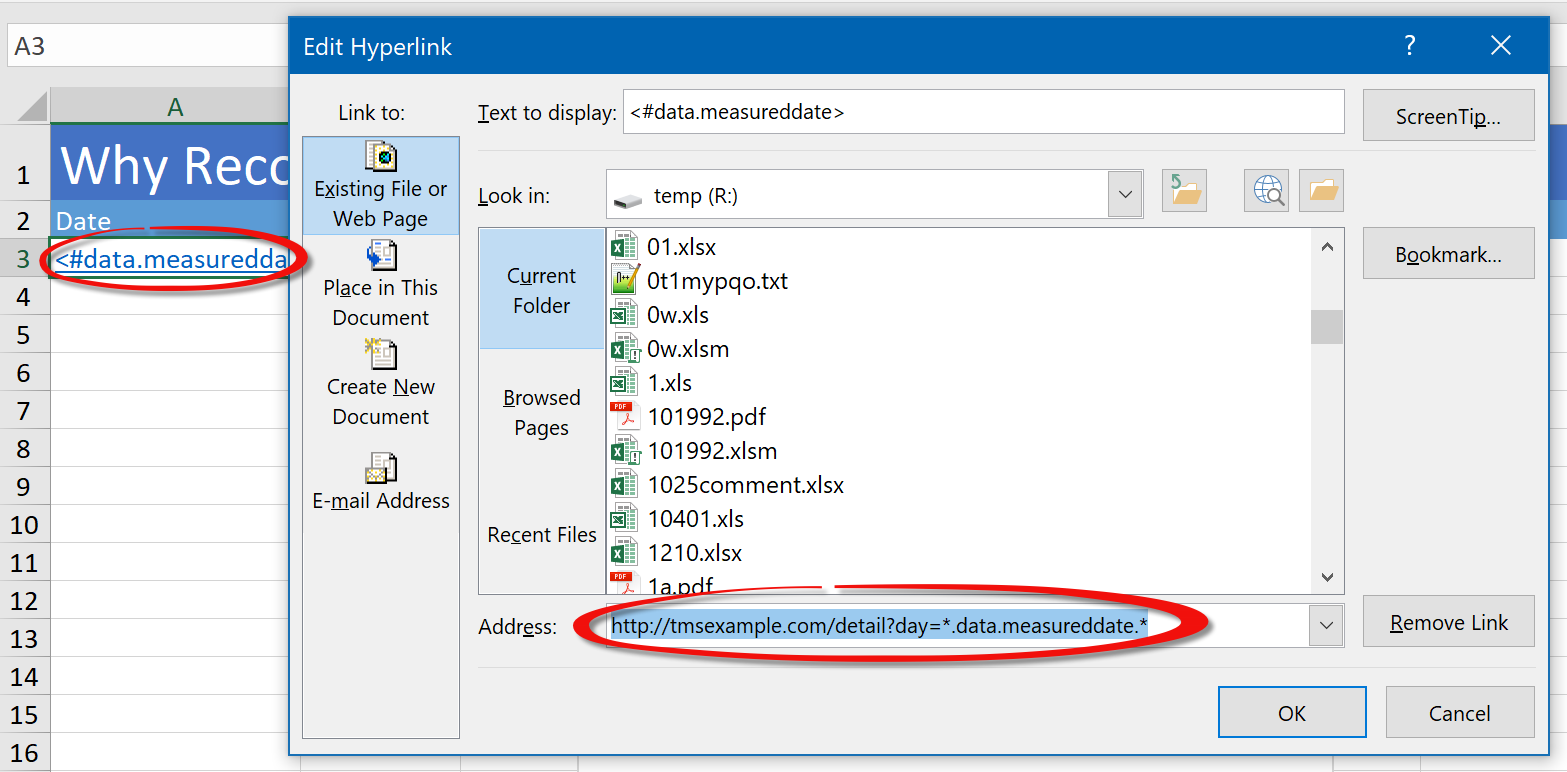
As in Excel you can't write FlexCel tags like <#data.measureddate> inside an hyperlink, FlexCel allows the alternative syntax *.data.measureddate.* instead, and that is what we used above.
We also used a bogus domain name, tmsexample.com because Excel only understands absolute hyperlinks. When exporting to html with FlexCel, we will set the BaseUrl property in the FlexCelReport component to:
html.BaseUrl := 'http://tmsexample.com';
and that will make the url relative by removing the start of it. We could have used any other domain name here, the only thing required is that we use the same name in the template and in the BaseUrl property.

We will also create a why-template.xls which is similar to the master, but with different formatting and a link to go back in cell A1 instead of a link to drill down in cell A3.


Next step would be to add a new DataSet to the datamodule to do the query for one day, instead of the query grouped by days that we had before.

And finally, the server now needs to handle requests for the detail and for the master. We will do this by adding a new action to the webbroker module:


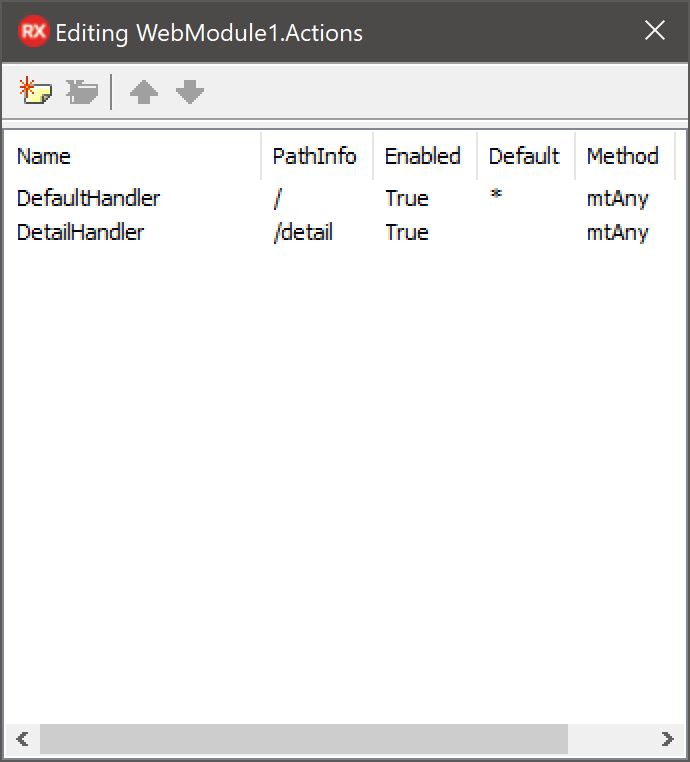
The actions now are like this:
procedure TWebModule1.WebModule1DefaultHandlerAction(Sender: TObject;
  Request: TWebRequest; Response: TWebResponse; var Handled: Boolean);
begin
  RunReport('why-master.xls', datamodule1.data, TDateTime(0));
end;

procedure TWebModule1.WebModule1DetailHandlerAction(Sender: TObject;
  Request: TWebRequest; Response: TWebResponse; var Handled: Boolean);
var
  date: TDateTime;
  day: string;
begin
  day:= Request.QueryFields.Values['day'];
  date := Trunc(StrToDate(day));
  DataModule1.detail.Parameters.ParamByName('day').Value := date;

  RunReport('why-detail.xls', datamodule1.detail, date);
end;
Where "RunReport" is a generic method that is more or less similar to the previous examples. We are not going to show it here since it is not interesting, and as with the other examples, the full source code is at the end of this post anyway.

Note: In this particular case I am using the dates without any preprocessing as parameters for the detail report, but this is far from ideal. You can never know if 1/3/1999 is March 1 or January 3, and client and server might understand dates differently, so the best solution is to use a neutral format like "yyyy-mm-dd" or even the date serial number. But to keep this example simple, I just used the localized dates as parameters.

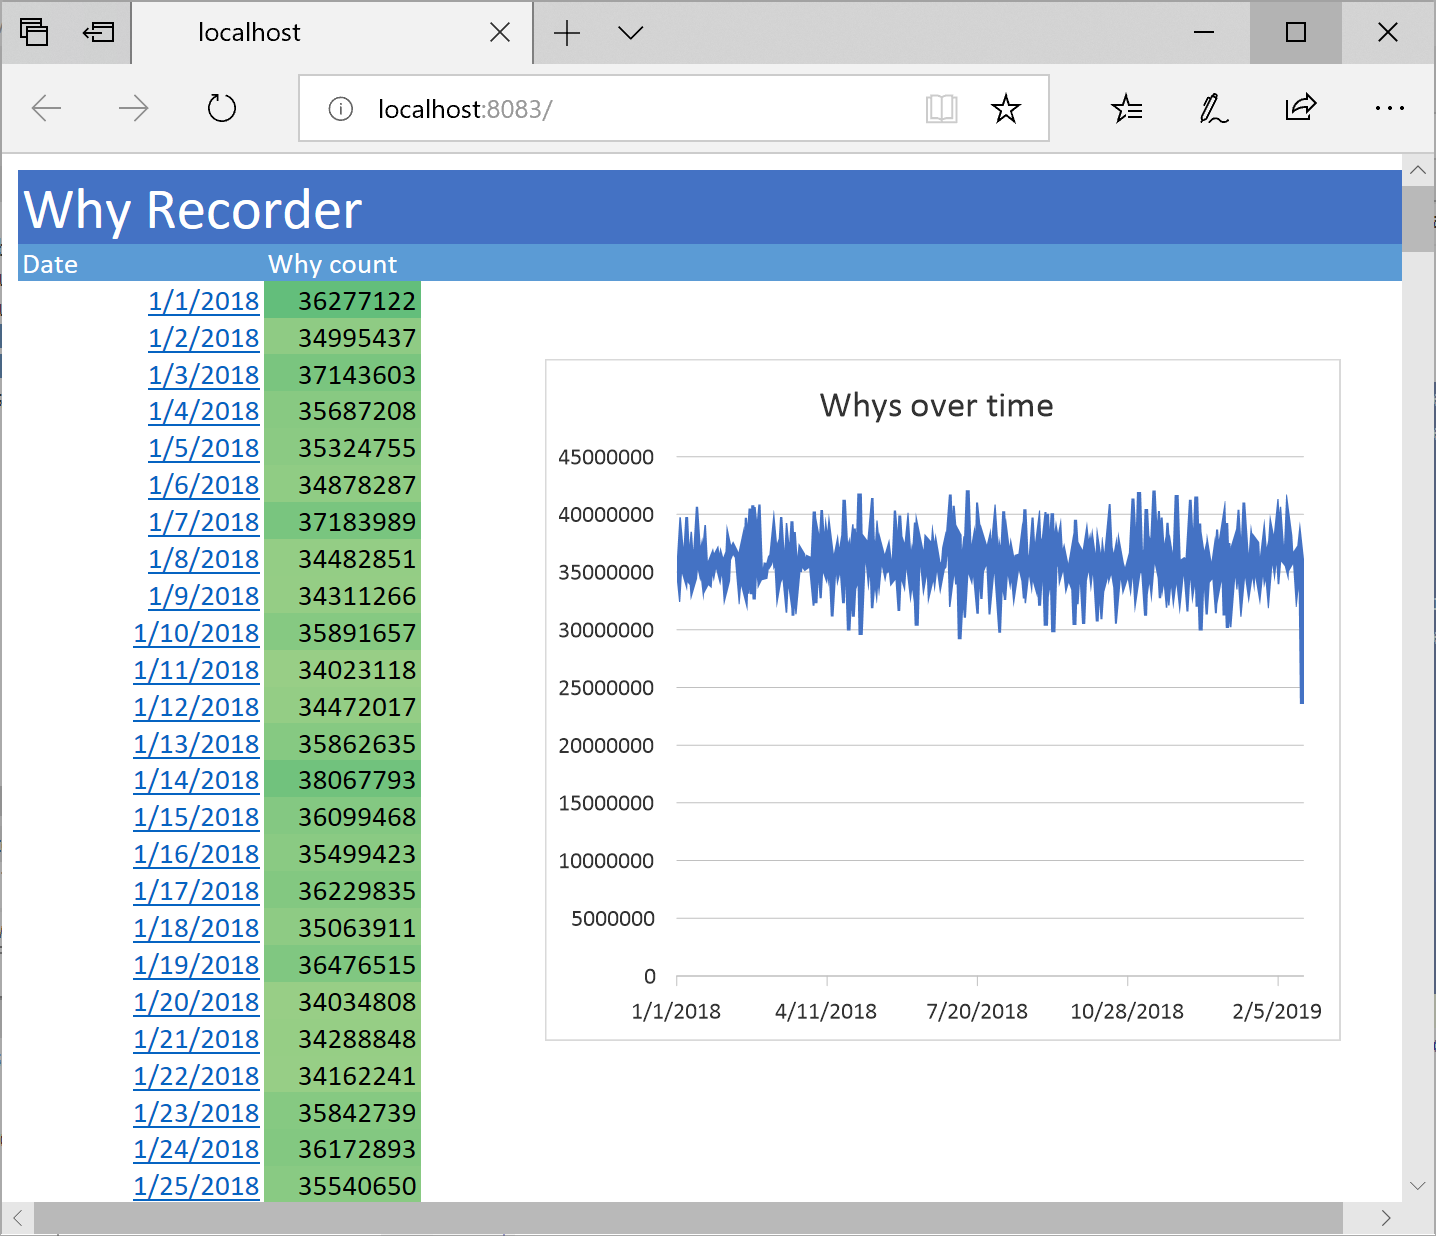
With these modifications, if you now run the server app, you should see a screen like this:


And if you now click on a date, say January 8, you should see the details for that day:


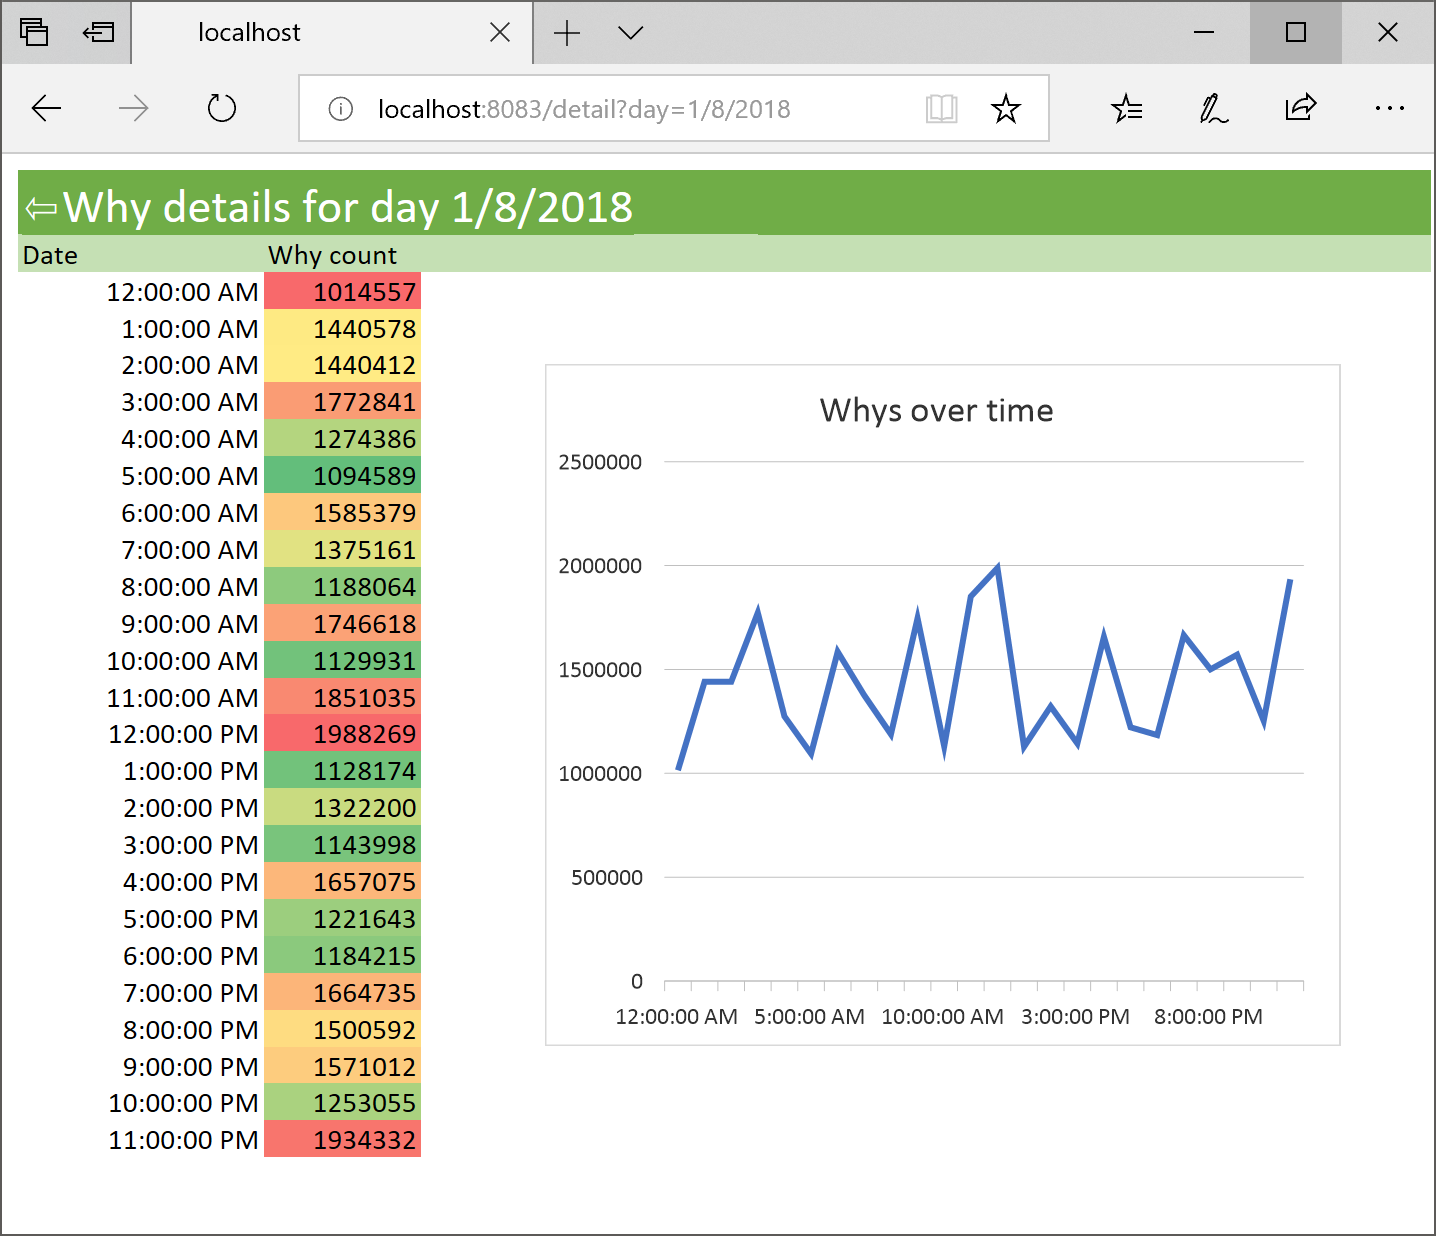
You can click in the arrow at the top to go back to the main report.

4.2 Client Side

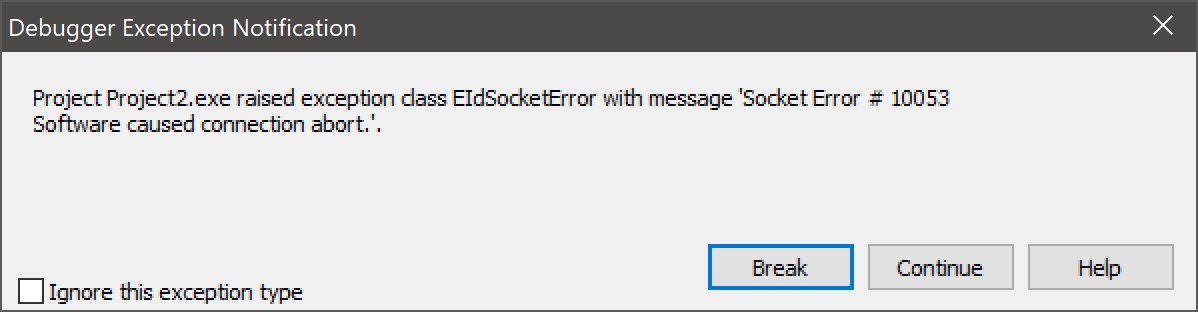
Finally, the last thing to study is how to make this work as a TMS WebCore application. At first sight, we might think that the application from the last example should work: after all the master report has relative links to the details, and the details to the master, so it all should work transparently. It is already working if you call the webpages directly.

But, if you try the application, you will notice that the master report loads fine, but when you click on the links, you get an error:


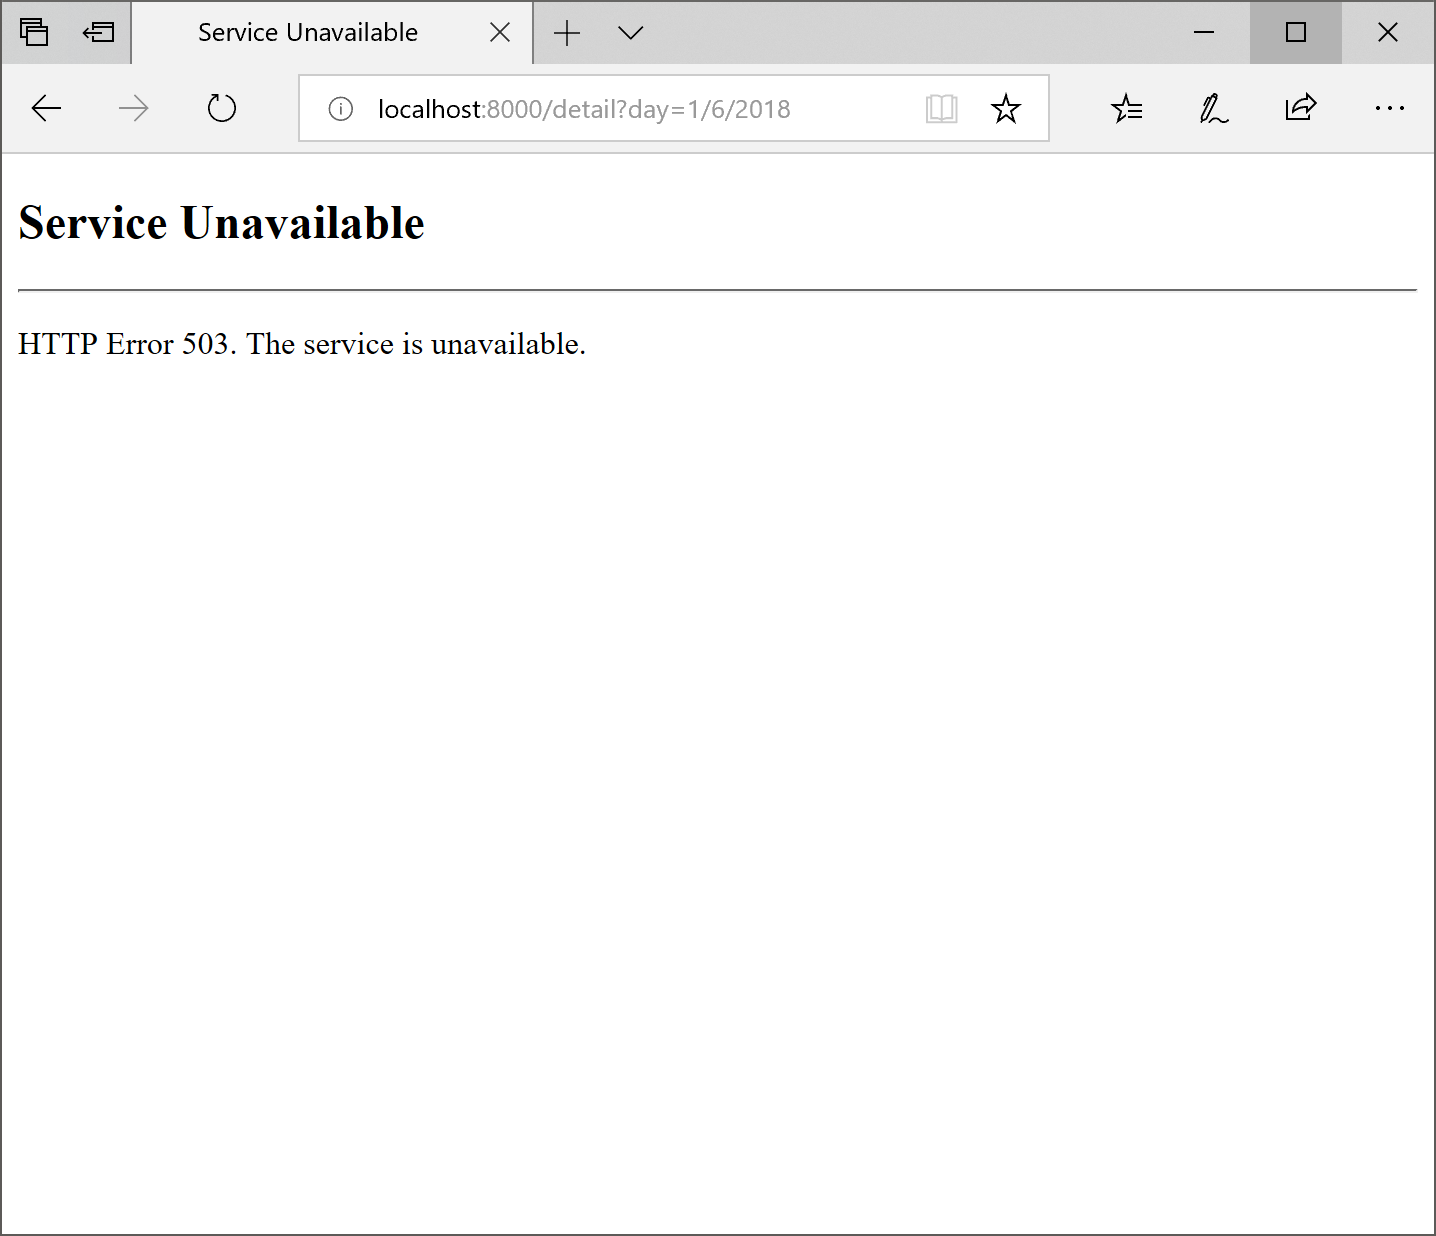
The explanation on why this is happening is simple, but it might not be completely intuitive. If you look at the Url in the previous screenshot, you'll see it points to http://localhost:8000/detail?day=1/6/2018. But the server is running in port 8083, so that is why the error. The relative Url in the report is being resolved with the address of the client, not the server.

The approach here works for a separate report (one that you would open with Window.Open) but it just won't work for reports that are integrated in the app. For that, we need to dig a little bit further.

5. Hyperlinks in integrated reports

As we have seen in point 4, when running integrated reports, we can't just have the reports link to other subreports. Those links would take us away from our app, which is running as a single page in the client.

What we need to do is to convert those links in the master report to javascript calls, and then modify our app to handle those javascript links and open the correct report inside our application.

5.1. Server side

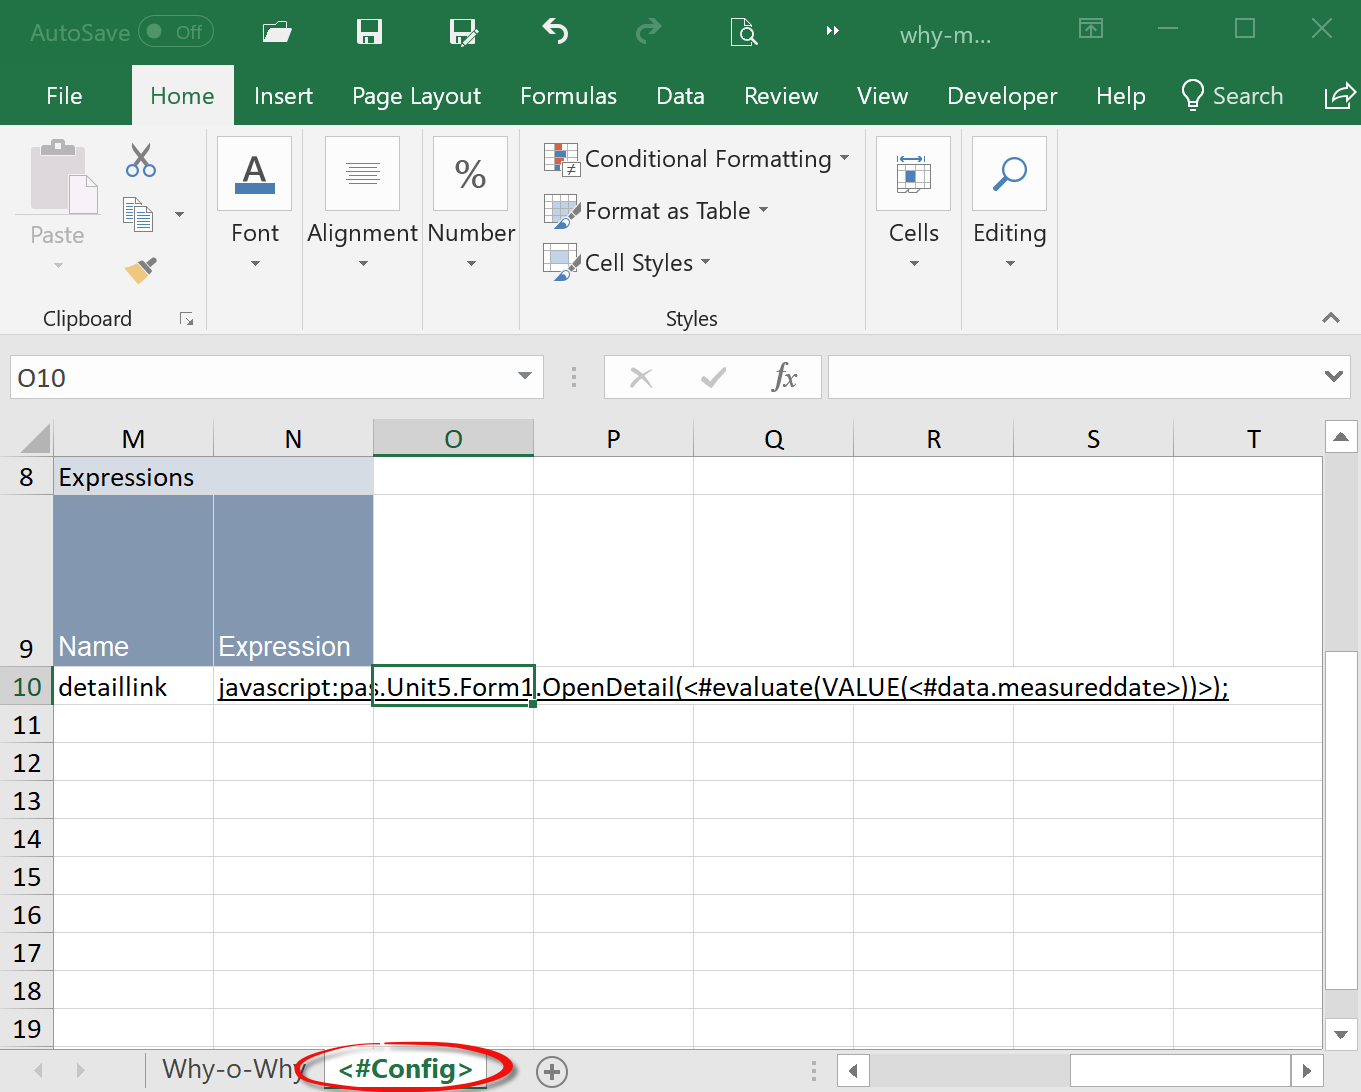
Server side, we now need to generate Javascript links, not links to a different page.While we are at it, we will use the date serial number instead of the date string as the parameter, as to avoid the problem of what date is "1/2/1999" which we mentioned in the previous section.

As the expression in the hyperlink is going to get a little complex, we are going to start by creating a config sheet in the master report template. A config sheet is just a special sheet in a FlexCel report where you can define a lot of the stuff that goes into the report. In our case, we are going to add an expression named detaillink which we will define as:
detaillink = javascript:pas.Unit5.Form1.OpenDetail(<#evaluate(VALUE(<#data.measureddate>))>);


Then we will edit the hyperlink itself, and change it to be:
http://tmsexample.com/*.detaillink.*
Different from the previous example, now the logic on what goes in *.detaillink.* is now encapsulated in the config sheet, and we can now play with its definition without having to edit the link

The rest of the application is going to be the same as in our last example, but with a small meaningful difference. This time we are going to add a slash at the end of the BaseUrl property.
html.BaseUrl := 'http://tmsexample.com/';
That extra / at the end will make sure we remove the starting / in the url, and end up with links like href="javascript:pas.Unit5.Form1.OpenDetail(43104);" instead of href="/javascript:pas.Unit5.Form1.OpenDetail(43104);"

We will do similar modifications to the detail template, so the links call an OpenMaster() javascript method.

5.2. Client Side

Client side is where we have to do more changes. Server side, we are now generating links which call some "OpenDetail" and "OpenMaster" methods in javascript, and pass the serial number of the date as the parameter for OpenDetail. We now need to define those functions in Javascript.

Luckily TMS WebCore makes it simple. We are going to just define two new pascal methods as follows:
procedure TForm1.OpenDetail(const Date: integer);
begin
  WebHttpRequest1.URL := 'http://localhost:8084/detail?day=' + IntToStr(Date);
  WebHttpRequest1.Execute;
  WebButton1.Enabled := false;
end;

procedure TForm1.OpenMaster;
begin
  WebHttpRequest1.URL := 'http://localhost:8084';
  WebHttpRequest1.Execute;
  WebButton1.Enabled := false;
end;
And make them part of the published interface of the class.

Now, when we get a link like "javascript:pas.Unit5.Form1.OpenDetail(43104)" from the report, the browser will call the method OpenDetail in our code, and pass 43104 as a parameter. As you could see in the code above, we use that parameter to fetch the correct report from the server, and then it is loaded as any other report.

So to round it all up, and as this is a blog about a tms day, below you can see a small video showing how this small reporting app ended up working:


The future

I wasn't originally planning to speak about the future when I started preparing the presentation, as I was just planning to keep FlexCel server only. But as I mentioned at the start, after speaking with people on the TMS day I got convinced that we need to do more with FlexCel in the Javascript front end.

So where do we start? To be realistic, there is little chance that FlexCel will be compiled with TMS WebCore in the near future. FlexCel uses a lot of generics and other stuff that is not supported by the pascal to js compiler, and to be 100% sincere, we can't even compile FlexCel with Lazarus which supposedly has the features we need. (and believe me, we've tried).

But FlexCel is not only FlexCel for Delphi. We also have FlexCel for .NET which could be converted to asm.js or webassembly. Once it is javascript, it doesn't matter if we started from Pascal or C# code, it will work the same.

FlexCel .NET could be an option. But in this TMS day we introduced another possibility, which seems likely to be the one that wins. You know, there has been a third branch of FlexCel living a "secret" life since 2015. This branch is fully written in C++ 11, and C++ converts pretty well to Webassembly. I said it on tms day and I will say it again now: There is no guarantee that FlexCel for C++ will ever reach a stage where we release it. Please don't wait for it. Our priorities are in FlexCel itself, right now more specifically in FlexCel 7 which will have xlsx chart rendering and will let us do the same demos we did here with xlsx files instead of xls and still show the charts. FlexCel C++ is a side project, which gets time only when there isn't anything more urgent, which is very little time.

Now, with the disclaimer out of the way, FlexCel for C++ is actually working for small cases, and the conversion to Webassembly was so seamless that it looked like magic. So I really wanted to show it working. We took some small tests which are passing in C++, compiled them with Webassembly, and saw the results. I am not going to replicate what we did there, as the post would get too long, but I just want to share some screenshots with the final results.

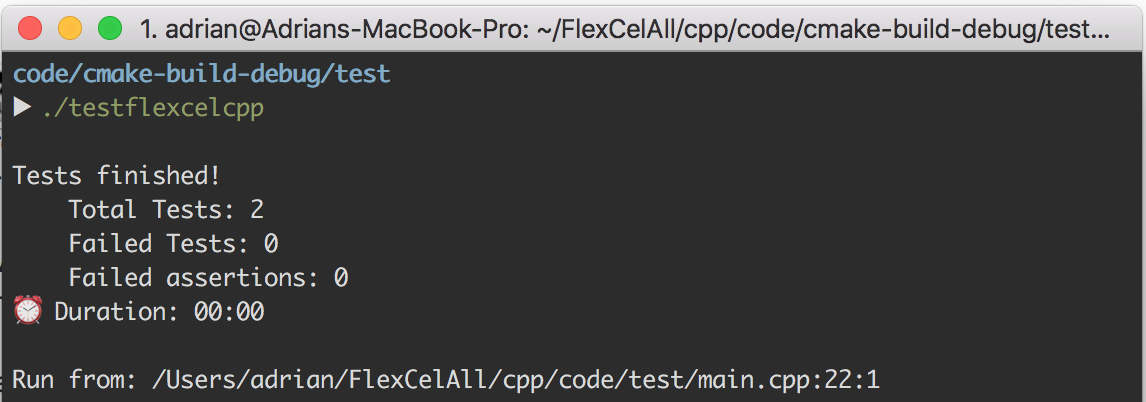
This is the tests running in C++:


And here they are running in node.js:


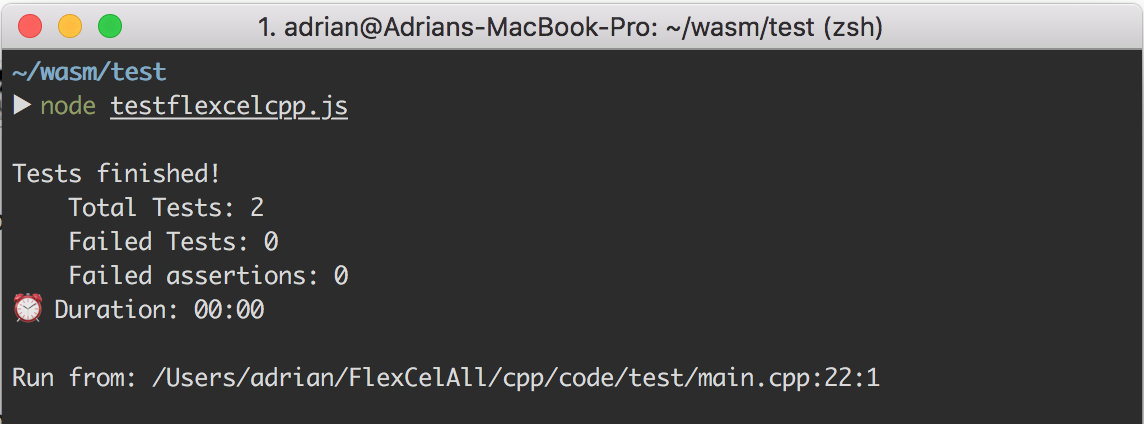
Yes, they look the same, and no, they aren't even remotely similar. One is running compiled C++ code in a mac, the other is javascript running under node.js. And the tests aren't trivial either, they are reading and creating xlsx files already. And yes, if I change the code, I can see the assertions break in both C++ and Javascript; we did that live on tms day. It does seem kind of magical to me.

So this are the plans, or maybe the dreams right now. What the future will actually bring nobody knows, but it feels good to share those dreams with you. With a little more bit (actually a lot) of effort they could actually come true. I know I am really looking forward to have C++ and Webassembly versions of FlexCel.

Q & A

Sadly this time we didn't got time to do a Q&A, and I feel sad about it. Q&A are the parts that I enjoy more on the presentations. To make up for it, please ask your questions in the comments!

You can get the source code for all the demos and the powerpoint slides used in the presentation here: http://www.tmssoftware.biz/flexcel/samples/tmsday-flexcel-and-webcore.zip


Object Pascal: Compiler Directives

$
0
0

Photo by Mathyas Kurmann on Unsplash

Compilation Directives could help you to make your code multi-platform or even cross-compiled.

Introduction

Compilation directives are powerful commands that developers could use to customize how the compiler works.

These directives pass parameters to the compiler, stating the arguments of the compilation, how must be compiled, and which will be compiled.

There are basically 3 types of compilation directives.

  • Switch directive
  • Parameter directive
  • Conditional compilation directive

The first two types change the compile parameters, while the last one changes what the compiler will perform on.

In this article we will deal with the last one: Conditionals.

Conditionals

They are powerful commands.

With just a few conditional commands, your Object Pascal code can be compilable across multiple platforms.

However, as we add more and more directives, the code will become more complex.

Let's take a look in the example below:

 //http://docwiki.embarcadero.com/RADStudio/Tokyo/en/Conditional_compilation_(Delphi)
  {$DEFINE DEBUG}
  {$IFDEF DEBUG}
  Writeln('Debug is on.'); // This code executes.
  {$ELSE}
  Writeln('Debug is off.'); // This code does not execute.
  {$ENDIF}
  {$UNDEF DEBUG}
  {$IFNDEF DEBUG}
  Writeln('Debug is off.'); // This code executes.
  {$ENDIF}

In this example, only the first and third Writeln function calls will be executed.

All directives and also the second function call won't be part of the final executable, I mean, the ASSEMBLY code.

Cool.

However, it looks like that the code is "dirty" and also we have a temporal coupling, because the constants need to be defined in a specific order.

Directives and definitions of constants that will be used in only a single unit may even be manageable, but what if you will work with tens or even hundreds of units that will use these directives and definitions, do you still think this approach is the best choice for the architecture of your project, with the purpose of building it as cross-compiled or multi-platform?

I don't think so.

Encapsulating Directives

Imagine a project that needs to be cross-compiled in Delphi and Free Pascal. We would like to use the same classes, the same code, but could exists some differences between these compilers.

The code needs to evolve independent of the compiler. I mean, if some changes could be done to improve the code when it is compiled on Free Pascal, for example, it should be done without thinking in some difference that might exist in Delphi.

To do so properly, we could not work in a code with many compilation directives, because some changes could broke the Delphi version or vice-versa.

Instead of seeing directives, it might be better seeing just classes.

I would called this, encapsulated directives.

Implementation

Imagine an unit witch contains a class to represents a MD5 algorithm.

Free Pascal already has a md5 unit which has functions to do the job and of course we have to make classes to encapsulate those functions.

In Delphi, the unit that do the same job is named hash.

We do not want to "reinvent the wheel" then, let's use what is already done on both platforms.

So, how would you do this implementation neither using conditional directives in implementation code nor *.inc files?

First of all, let's create our MD5 unit:

unit MD5.Classes;

interface

uses
  {$ifdef FPC} MD5.FPC {$else} MD5.Delphi {$endif};

type
  TMD5Encoder = class(TEncoder);

implementation

end.

As you can see, there is almost nothing on this unit. The real code will stay in others units, i.e, MD5.FPC and MD5.Delphi, one for each platform.

Let's create the FPC version:

unit MD5.FPC;

interface

uses
  md5;

type
  TEncoder = class
  public
    function Encode(const Value: string): string;
  end;

implementation

function TEncoder.Encode(const Value: string): string;
begin
  Result := MD5Print(MD5String(Value));
end;

end.
Those functions with prefix "MD5" comes from md5 unit.

Then, let's create the Delphi version:

unit MD5.Delphi;

interface

uses
  hash;

type
  TEncoder = class
  public
    function Encode(const Value: string): string;
  end;

implementation

function TEncoder.Encode(const Value: string): string;
begin
  Result :=THashMD5.GetHashString(Value);
end;

end.

Both units have the TEncoder class definition (yes, same name in both). Then, we created a TMD5Encoder class that inherits from the correct class, which is platform dependent, and voila! We have clean units, without any conditional directives inside methods.

Finally, we have two distinct classes in different units that can evolve its implementation independently, without any fear of breaking the code between platforms.

Conclusion

Compilation directives is a good tool for customize the code. However, it should be used with parsimony.

In object-oriented code, try to use more specialized objects than compilation directives.

For each conditional directive that you want to add to the code, I suggest implementing a new class that encapsulates the directive or a set of them.

Your code will be cleaner and sustainable.

See you.


TMS RADical WEB, preferred error handling?

$
0
0

With almost all in the TMS development team and since some time also many TMS ALL-ACCESS users busy using TMS WEB Core to develop web client applications from the Delphi IDE, we wonder about what could be the preferred developer experience to deal with run-time errors?

To situate, there are different categories of errors, but to focus we'll divide the types of errors in two categories:

  • Delphi code causing exceptions
  • DOM manipulations causing errors
A Delphi code exception is for example an out of bounds access in an array. A DOM error is for example accessing a non-existing attribute of a HTML DOM element or a network error. The standard behavior in the browser is that the error is displayed in the console. To see the error, the developer needs to open the console (for example with the F12 in the Google Chrome browser). When not looking in the console, errors go in many cases unnoticed.

As a software developer, we're interested in all sorts of errors so we can locate the cause and apply fixes to avoid the errors. From the feedback of several users already busy with TMS WEB Core, we learned that in many cases an unexpected behavior is reported but it is overlooked to look in the console to get more details about what exactly might have happened. This made us reflect on how we can do better to make it clear to developers that an error happened in the web application. There are several possibilities and perhaps there are even more we didn't think about yet.

For an error, like an out of bounds exception that looks in the console like:


some alternative possibilities are:

1) Show the error as an alert (modal dialog in the browser):


Advantage is that it is blocking and thus can't be ignored but the position of the alert is controlled by the browser and somewhat awkward. Disadvantage is that we need to click the dialog away for every error that happens.

2) Show the error with a nicer TMS WEB Core dialog that makes it more clear it concerns an error:


Advantage is that it is centered in the window and cannot be misinterpreted that it concerns an error. Disadvantage here is also that we need to click the dialog away for every error that happens.

3) Show the error in a red colored area at the bottom of the browser window:


Advantage is that it is less intrusive and the red colored area can host multiple errors simultaneously when it grows.

4) Let the developer decide what to do from the Application object OnError event:

procedure TForm1.AppErrorHandler(Sender: TObject; AError: TAppplicationError;
  var Handled: boolean);
begin
  ShowMessage(AError.AMessage+#13+AError.AFile+#13+inttostr(AError.ALineNumber)+':'+inttostr(AError.AColNumber)+#13+AError.AStack);
end;

5) Show the error in the Delphi IDE:


This is far from trivial but we have some experimental code & proof of concepts that could make this perhaps in the future also a feasible solution.

6) Other solutions?:

Perhaps there are other possibilities we didn't think about yet, so we're curious to hear your thoughts!

We had some internal discussions with the development team here and there are different opinions. So, therefore, we wonder what your thoughts are and what you think is the preferred way to handle errors for your Delphi web client applications. Note that the default behavior could even be different in DEBUG mode from RELEASE mode.

You can vote here what your preferred error handling method is or you can leave comments on this blog:


New linear algebra operations and symbolic features in TMS Analytics & Physics library

$
0
0

TMS Analytics & Physics developing library supports operations with array and matrix variables and includes special package of linear algebra functions. New version 2.5 introduces many capabilities and improvements for linear algebra operations. First, new operators introduces specially for vector and matrix operations: cross product operator ‘×’, matrix inverse operator ‘`’, norm operator ‘||’. In previous version of Analytics library matrix multiplication with standard linear algebra rules were implemented using multiply operator ‘*’. In new version matrix-matrix and matrix-vector multiplication implemented using the cross product operator, and the multiply operator used for by-element multiplication. This leads to more compliant algebra rules: multiply operation is always commutative, as for numbers as for matrices and vectors, and the cross operation is not commutative. By the same reason, the inverse operation used now for calculating inverse of square matrices, as the division operation now is always by-element one (so, the division operation is the inverse of multiplication). The norm operator evaluates the L2 norm of vectors and matrices, and the absolute operator ‘||’ used for evaluating absolute values of vector and matrix components. Let us consider the difference between multiplication operator and cross operator with the simple example. Suppose there are the following two matrix variables:

A [3x3] =       		  	B [3x3]=   
( 0 0.1 0.2)				( 1 0 0)
( 1 1.1 1.2)      			( 0 2 0)
( 2 2.2 2.3)      			( 0 0 3)
Evaluating expressions for multiplying the matrices using cross and multiply operators we get the following results:
A×B	= [3x3] =            	A*B	= [3x3]= 
( 0 0.2 0.6)				( 0   0   0)
( 1 2.2 3.6)				( 0 2.2   0)
( 2 4.4 6.9)				( 0   0 6.9)
As can be seen from evaluation result, the first operation implemented with standard linear algebra rules for matrix product (https://en.wikipedia.org/wiki/Matrix_multiplication), as the second operation is just by-element multiplication of the matrices. The latter operation frequently used in signal and image processing algorithms (https://en.wikipedia.org/wiki/Hadamard_product_(matrices)). Combination of both operations can be used in one expression.

In addition to the operators, new functions for matrix arguments have been introduced in Linear Algebra package: trace of a square matrix tr(M), determinant of a square matrix det(M), adjoint of a square matrix adj(M), condition number of a square matrix cond(M), pseudo-inverse of a rectangular matrix pinv(M). The second improvement concerns symbolic capabilities for vectors and matrices. In previous versions, the only way of using arrays in formulae was introducing variables for them. The version 2.5 allows using explicit vector and matrix expressions in any symbolic formula. Example of simple vector expression with four components ‘[sin(x) cos(y) e^-x a*b]’. Matrix expressions are 2D rectangular arrays of expression elements. For example, ‘[[i j k] [sin(a) cos(a) -1]]’ is a 2x3 matrix expression.

Vector and matrix expressions can be used in formulae like vector and matrix variables. The difference is that the former are unnamed but their components can depend on other variables. Thus, we can calculate symbolic derivatives of the expressions. For example, the derivative of the above vector expression by ‘x’ is ‘[cos(x) 0 –(e^-x) 0]’.

For evaluating values of vector and matrix expressions, all their components must have the same type. The component types supported are: Boolean, Real and Complex.

As example of evaluating vector expressions let us consider the following problem: there is the array ‘A’ with four components and we need to calculate new array, selecting components from the ‘A’ by different four conditions. For solving this problem we can use vector form of ‘if’ function. The expression can be the following: ‘if{[a>1 b<3 a-x>0 b+x<2]}(A [-1 -2 -3 -4])’. Here the condition of the ‘if’ function defined by the vector expression with four Boolean expression components, depending on other variables: ‘a>1’, ‘b<3’, ‘a-x>0’ and ‘b+x<2’. The arguments of the functions are array variable ‘A’ and vector expression with four real components. Evaluating the expression with some given variable values, we get the following result:
x = 1.5
a = 1
b = -2
A = (1 0.5 0.25 0.125 )

if{[a>1 b<3 a-x>0 b+x<2]}(A [-1 -2 -3 -4]) = (-1 0.5 -3 0.125 )
The example demonstrated that vector and matrix expressions can be used together with array and matrix variables and, in some cases, they are more flexible, because their components can depend on other variables.

These new improvements of linear algebra capabilities allowed realizing vector basis for linear least squares approximation. Here is the source code of an approximation example using the vector basis:
var
  approximator: TLinearApproximator;
  basis: TLinearBasis;
  func: string;
  parameters: TArray<TVariable>;
  exponents, cValues: TArray<TFloat>;
  A: TVariable;
  dim, order: integer;
begin
  // Setting parameters for approximation.
  dim:= 1; // One dimension.
  // exponent values
  exponents:= TArray<TFloat&ht;.Create(0.0, 0.5, -0.5, 0.7, -0.7); 
  order:= Length(exponents); // Basis order is the size of the array.
  // Vector variable for exponent array.
  A:= TRealArrayVariable.Create('A', exponents); 
  parameters:= TArray<TVariable>.Create(A); // Parameters for Vector basis.
  func:= 'e^(A*X[0])'; // Vector function for basis - returns real vector.
  
  // Create the basis with the specified function and parameters.
  basis:= TLinearVectorBasis.Create('X', 'C', order, dim, parameters, func);

  approximator:= TLinearLeastSquares.Create; // Linear approximator.
  // Calculate the optimal basis coefficients.
  cValues:= approximator.Approximate(basis, vData, fData); 

  // Using the approximation (basis with optimal coefficients)...
end;	
As can be seen from the code, approximation basis function has very compact form – ‘e^(A*X[0])’, because it uses vector variable ‘A’ and so, the return value of the function is real vector. The result of the approximation for some given data is the following:

F(X, C, A) = C•e^(A*X[0])

F(X) = [0.015894261869996 -0.000559709975637631 0.560703382127893
             6.67799570997929E-5 -0.60704298180144]•e^([0 0.5 -0.5 0.7 -0.7]*X[0])


Advantages of using vector basis are:
  • Simple basis function expression (in vector form).
  • Easily create high-order basis (using big array parameter).
  • Use arbitrary coefficients for the basis (fractional exponents, powers and so on).
  • Change the basis without changing the function (use other values of the parameter array ‘A’).
In addition to the vector and matrix expressions, there are some other symbolic features in the version 2.5. One feature is calculating symbolic expression for n-order or mixed derivative with one function call. The code below calculates mixed derivative of a complicated expression:
var
  translator: TTranslator;
  F, Dxy: string;
begin
  translator:= TTranslator.Create;

  F:= '(y-A*ln(y))/x+B*(v(x+y))^(2/Pi)';
  Dxy:= translator.Derivative(F, TArray<string>.Create('x','y'));

  // using mixed derivative Dxy...
end;
The output result for the derivative is:
F(x,y)  = (y-A*ln(y))/x+B*(v(x+y))^(2/Pi)
dF/dxdy = (-1+A/y)/x^2+B*(1/p-1)*(x+y)^(1/p-2)/p
Note, that after derivative evaluation the result expression simplified. New simplifications in version 2.5 are: put minus operator under sum and product expressions (first expression in the sum ‘(-1+A/y)/x^2’); simplification of square root and power expressions (second expression in the sum ‘B*(1/p-1)*(x+y)^(1/p-2)/p’). Finally, there is new symbolic function that allows getting all variable names from math expressions. Here is an example of using the function:
var
  F: string;
  Names: TArray<string>;
begin
  F:= 'A[i]*sin(2*Pi*x)+A[j]*cos(2*Pi*y)+B[i]*e^((1+I)*x)+B[j]*e^((1-2I)*y)';
  Names:= TTranslator.VariableNames(F);

  // using the Names array...
end;
The result is the following:
F = A[i]*sin(2*Pi*x)+A[j]*cos(2*Pi*y)+B[i]*e^((1+I)*x)+B[j]*e^((1-2I)*y)
Variable names: A, i, x, j, y, B
Note, that the function does not include variable names in the result twice (i, j, x, y, A, B). In addition, standard constants, like Pi and Euler number, not included in the names list.

The version 2.5 is already available here. Source code of the example application can be downloaded from here. Other examples of using vector/matrix operations, expressions and vector basis with graphics visualization included in demo projects of the version 2.5.

TMS WEB Core v1.0 Brescia is released, the journey begins

$
0
0


Several months ago, we announced the TMS RADical Web concept to bring RAD component based web development to Delphi. The foundation of this concept is TMS WEB Core.

TMS WEB Core comprises:

  • a component framework
  • a (Web) RTL
  • a Pascal to JavaScript compiler
  • a Delphi IDE integration

TMS WEB Core enables to build modern web client applications following the single-page architecture that also other modern frameworks like Angular, vue.js, React employ.

The web for Delphi developers ...

With TMS WEB Core, you feel right at home in the Delphi IDE, not only with respect to language, code editor, form designer but also with respect to component framework where many direct web-based counterparts are available for edit, button, label, listbox, grid ... and many more UI controls.

Delphi for web developers ...

Equally important, with TMS WEB Core, you also feel right at home in the magic world of web development. TMS WEB Core is designed to be open to other Javascript frameworks. Out of the box, there is support to bind to jQuery controls and we have wrapped already a significant part of the jQWidget UI controls into easy to use Pascal components. TMS WEB Core is totally open to CSS styling, to optionally design web pages fully in HTML/CSS (possibly by a person different from the software developer with expertise in nice graphic webdesign).
TMS WEB Core is also to the server technology of your choice. TMS WEB Core web client applications can enjoy first-class binding to data via the familiar TDataSet concept via our TMS XData REST API server technology. But you can use at the same time Embarcadero RAD Server, a node.js based REST API, ASP.NET Core microservices etc..

The power of FNC ...

And we did more magic with TMS WEB Core and the TMS FNC framework. We did nothing less than web-enable our FNC component architecture. That means that our FNC UI controls that were already usable for VCL Windows application development, FMX Windows, macOS, iOS and Android development and LCL Windows, macOS and Linux/Raspbian development can now also be used to develop web applications. This incredible technical wizardry has never been done before. Now you can share Delphi code between desktop, mobile and web applications, including user-interface logic as our FNC controls are 100% code interface compatible between VCL, FMX, LCL and now also WEB with TMS WEB Core.

We invite you to take your time to explore the tons of new capabilties that open up for Delphi developers. A fully functional trial for TMS WEB Core is available now as well as trial versions for TMS FNC UI controls, TMS XData and you can use of course TMS WEB Core with other JavaScript libraries, other web controls and other server technologies. There is meanwhile a long list of videos showing the features and capabilities

A huge team effort ...

The development of TMS WEB Core took almost 1.5 years so far with a team of over 10 people and was the biggest effort ever in the history of our company TMS software. Never before have so many talented colleagues and bright minds been at work together on this exciting new development. Never before have we been so passionate about a new product. Discover more about the team wizards in upcoming blogs. Now it is your time to enjoy the fruits of this hard labor.

Low barrier to start ...

We wanted TMS WEB Core to be easily accessible & affordable for everyone. From hobbyist, self-employed consultants, small companies, schools, trainers to large companies. Therefore, we have set the TMS WEB Core launch price to only 295EUR for a single developer license. You will not only enjoy this new exciting product, but also get updates & priority support for a full year. After this period, renewals are offered at 70% discount of the new license price.
For developers who like to have the convenience of having our full toolbox directly accessible, there is TMS ALL-ACCESS. With TMS ALL-ACCESS you get TMS WEB Core to build your web client applications but also our TMS XData REST API server technology and our full suite of FNC UI controls to enrich your array of UI controls available for your web applications.

Only the beginning ...

The world of the web is large, very large. With TMS WEB Core v1.0, we are only at the beginning of a long journey. As the famous Mille Miglia route is one of the most fantastic journeys in the world, we thought it was nice to visualize the journey of TMS WEB Core as part of TMS RADical Web via the route of the Mille Miglia.

Therefore, it is fitting that this TMS WEB Core v1.0 is named after Brescia, the start of the Mille Miglia and we will follow the track of the legendary year 1955. As you can see, the next milestone is Verona and so the next major release will be called Verona. In a follow-up blog, we will reveal some more details of the roadmap, the milestones of versions you can expect along this famous track. I would say, enjoy this exciting trip and follow with us along the track!

A new world opens for FNC: the world-wide-web!

$
0
0


Yesterday, we released TMS WEB Core v1.0 Brescia edition. This brings RAD component based development of web client applications from the Delphi IDE. TMS WEB Core is designed to be open. It comes with numerous built-in UI controls that are close equivalents to standard VCL controls like TButton, TListBox, TEdit, TMemo, TStringGrid etc... In addition, TMS WEB Core comes with Pascal wrapper classes that allow you to use jQuery controls (we have a partnership with jQWidgets for this) and in the future, we'll bring much more wrappers around existing web controls. But for Delphi developers, there is an extra gem, the TMS FNC Controls.

It all started end of 2015 ...

We started developing the FNC architecture in 2015 as a UI control architecture that would allow to create UI controls from a single source code base that are usable from VCL Windows applications, FMX Windows, macOS, iOS and Android applications and also from LCL (the component framework in the free Lazarus IDE) for Windows, macOS and Linux.

With the FNC architecture, there is only one learning curve to master complex UI controls like a grid, planner, treeview, richeditor, ... in different applications using different frameworks, but you can also reuse your UI control logic through these different applications.

Opening a new world for FNC ...

Now, with TMS WEB Core, we have opened a whole new world for the FNC controls. Yes, we have web-enabled the FNC control architecture and that means that, from now on, you can use our FNC UI controls from TMS WEB Core web client applications.

FNC in action

To see the power of the TMS FNC controls, here you can find the FNC grid in the Delphi IDE used in a TMS WEB Core application:

and it runs directly in the browser.


Or even better, just play with the demo yourself from your browser here

At this moment, the TMS FNC Chart, TMS FNC UI Pack and TMS FNC Dashboard Pack components will also show on the toolpalette and are ready for use in TMS WEB Core client applications. The FNC architecture is an open architecture. This means that you can also use it to create your own custom UI controls. You do this by descending from TTMSFNCCustomControl and by doing so, you will have a UI control that you will be able to literally use everywhere, from a Windows application to a Raspbian application, from an iOS app to a web application.

Learn more about TMS FNC controls via our

and exploring the trial versions downloads available for Delphi & C++Builder.

From Database to Web App through REST server with TMS XData and TMS WEB Core

$
0
0


As you might already know, TMS WEB Core v1.0 Brescia edition has been released. A game changer in web development using Delphi IDE. From all the "magic" things it does, one of my preferred is this: the way you code with it feels very very home for Delphi users - the language, the IDE, the form designer, the object properties, the component library... Still, what it produces is totally new and different. It creates html/js Simple Page Applications! It wraps real, existing JavaScript frameworks and controls. It connects to REST servers. It's a modern architecture that is far away from what many of Delphi developers are used to..

And that is probably the reason why we are receiving this frequent question: "How do I connect to my [MySql] database from TMS Web Core?" (and you can replace [MySql] by your favorite database server).

The answer is: You have plenty of options, but the best one is: TMS XData.

Why TMS XData, even for non-TMS Web users?

TMS XData is REST/JSON server framework. You can relate it more or less with DataSnap, ASP.NET Core Web Api, NodeJS Loopback, etc. But for Delphi. And how TMS XData is different? It's hard to say in a few words, but I will try by saying this: it just works: the product, the support and the experience.

XData is stable. It's incredible how low support we have from people complaining about errors, weird behavior, bad performance, etc. Recently, one pleased XData user sent to us a screenshot of his error log report. Take a look:


The first one was the number of errors logged from using DataSnap. After so many frustrations, he migrated to another one. The second line are errors from that second middle-tier Delphi framework he used. Then third one were errors after migrating to TMS XData. Zero errors. He even did the work to check if the error logging was working by forcing an error to happen, because he was not believing it. "Finally!" was his relief words.

Also other benchmark tests were done regarding memory usage, errors, performance. This one was made by a customer who was evaluating options at that time - not a XData user yet when the test was done: https://datasnapperformance.wordpress.com. He decided to go for TMS XData after being convinced by its own tests.

XData is a pleasure to work with. It doesn't have a steep learning curve. Documentation is extensive and using it is very intuitive. You can try it yourself. You can ask XData users. And there is TMS Aurelius behind it you can optionally use. The state-of-the-art ORM framework for Delphi. As a quick example, this is a code snippet of what you can to write to hit your database, retrieve a list of customer from your database based on a specific criteria, convert them to object instances, and return it as JSON from your server:

function ICustomerService.CustomersByStatus(Status: TCustomerStatus): TList<TCustomer>;
begin
  Result := TXDataOperationContext.Current.GetManager
    .Find<TCustomer>
    .Where(Linq['Status'] = Status)
    .OrderBy('Name')
    .List;
end;
TMS XData and TMS Web Core

Being TMS Web Core a SPA application, you can't connect to a database directly from the web application. You need a middle tier that will be the bridge between the web app and database. You should create one like everyone else, using PHP, ASP.NET, NodeJS, Delphi. But with TMS XData, it's an order of magnitude easier. You don't even need to write code like the CustomersByStatus method above if you don't want to - XData does it all automatically for you.

Import database structure and create classes. Using the TMS Data Modeler tool - included together with XData - you can import your database structure and then create a unit with all TMS Aurelius classes representing the database and then, export it as a unit with Aurelius classes:


Create XData server and add the ORM entities

Now using the TMS XData Server wizard, you can create the XData server in a few clicks, and just add the unit generated by Data Modeler to the project. Your server should be up and running!


Web front end using Dataset-like approach From TMS Web Core usage, XData provides high-level RAD framework. First you have TXDataWebConnection, which you just need to configure the root URL of the server. Then assign a TXDataWebClient or TXDataWebDataset to the connection, and you can retrieve/save data with simple methods. By using the dataset, you can even go further and bind to data-aware controls using the datasource. In the example below, we have a TWebDBTableControl bound to the datasource, bound to XData dataset, bound to XData connection:


And this is what we get in the browser. Note how data was retrieved from the server: an HTTP request to our REST server, and JSON format being return. Yes, a real pure html/js web application with REST Api backend, and we code it the Delphi way!


And that's how you get your data in the web! Of course, from now on, the sky is limit. In the backend, you can add complex business logic, authentication and authorization, and all the takes to create a real application. For the frontend, you have the plenty of TMS Web Core controls available, and all the html, javascript and css power in your hands to make your UI rich, nice and responsive.

Here is a screenshot of our TMS XData Music Web Application demo, available online at https://app.devgems.com/xdata/music/app. Full source code of the demo is available when you install TMS XData.


Do you want to see all the process described in the blog post in action? Watch the video below!


Learn more about TMS XData:
and exploring the trial versions downloads available for Delphi.

TMS WEB Core v1.0 Brescia tips & tricks

$
0
0


Since several months, many enthusiast Delphi developers that are on our TMS ALL-ACCESS subscription are exploring the new TMS WEB Core.
Since little over a week ago, we officially released the first version v1.0 named "Brescia edition" to symbolize the start of a new journey "Mille Miglia" and many more Delphi developers already joined us on this journey. From the numerous feedback we received so far, the two most commonly heard comments are:

"The more I work with TMS WEB Core, the more I love it"

and

"Wow, the possibilities of TMS WEB Core are virtually unlimited"

With so much possibilities comes a lot of knowledge. While our team also spends a significant amount of time on writing documentation and demos, we want to give in addition to this tips & tricks based on your questions at regular intervals. So, let's kick of with looking at two tips in depth:

Starting a TMS WEB Core application at a dynamically selected form

The default behavior is that a TMS WEB Core application starts with presenting the main form of the application, pretty much as is default the case for Delphi VCL applications. The code responsible for this is:

  Application.Initialize;
  Application.MainFormOnTaskbar := True;
  Application.CreateForm(TForm1, Form1);
  Application.Run;
Well, that's exactly the same as for a Delphi VCL application I can see you think, well, it is and it is on purpose to make all Delphi developers feel right at home with TMS WEB Core. When we start the TMS WEB Core application from its URL, for example, http://localhost:8000/Project1/Project1.html, this code will be executed and TForm1 will be created and shown in the browser. Then typically, from this main form, often many sub, detail or just other forms are being displayed during the lifetime of the application. Suppose that we have a very traditional customers/products/orders application. Wouldn't it be nice to create an URL that would allow us to directly navigate from our browser to the main sales form?

Well, doing this is actually quite simple. To start the application with the wanted form, we'll use a request parameter 'form' and have 3 keywords: customers, products and sales. We have forms TCustomersForm, TProductsForm, TOrdersForm. Let's use the request parameter now to start the form we want:
begin
  Application.Initialize;
  Application.AutoFormRoute := true;
  Application.MainFormOnTaskbar := True;

  if HasQueryParam('form',s) then
  begin
    if CompareText(s, 'customers') = 0 then
      Application.CreateForm(TCustomersForm1, CustomersForm);

    if CompareText(s, 'products') = 0 then
      Application.CreateForm(TProductsForm1, ProductsForm);

    if CompareText(s, 'sales') = 0 then
      Application.CreateForm(TSalesForm1, SalesForm);
  end
  else
    Application.CreateForm(TMainForm, MainForm);

  Application.Run;
end.
With this code in place, when no request parameters are used, i.e. http://localhost:8000/Project1/Project1.html the default TMainForm is shown. When we start the application via the URL http://localhost:8000/Project1/Project1.html?form=sales, it will show the sales form directly.

Important note is that the function HasQueryParam() is a function working with URL request parameters found in the unit WEBLib.WebTools, so make sure to add this unit to the uses list when you want to use it.

Creating forms fully dynamical with components

By default, every form in a TMS WEB Core application has a HTML file associated with it and the default behavior is that when opening a new form, this form uses the entire browser window. TMS WEB Core also facilitates to show forms created with the designer as a popup form or host this form in a HTML element on the form. But in this tips & tricks blog, we want to show how you can also create a form fully in code and display it. Surprisingly, or rather unsurprisingly, doing this is almost identical to dynamically creating a form with controls in VCL.

For the purpose of this example, we will create a form that will host a TWebMemo component and via this TWebMemo component, we will edit the contents of a TWebListBox on the form.
The form will contain a bottom aligned panel with an OK and Cancel button and a client memo control.

Let's jump into the code immediately:

procedure TForm1.WebButton1Click(Sender: TObject);
var
  btnOK,btnCancel: TWebButton;
  mem: TWebMemo;
  pnl: TWebPanel;
  frm: TWebForm;

  procedure HandleDialogClose(AValue: TModalResult);
  begin
    if AValue = mrOK then
    begin
      WebListBox1.Items.Assign(mem.Lines);
    end;
  end;

begin
  frm := TWebForm.CreateNew(self);
  frm.Caption := 'Strings';
  frm.Width := 600;
  frm.Height := 400;
  frm.Color := clWhite;
  frm.Shadow := true;
  frm.Position := poScreenCenter;
  frm.Border := fbSizeable;
  frm.Top := 100;
  frm.Left := 100;

  mem := TWebMemo.Create(frm);
  mem.Parent := frm;
  mem.AlignWithMargins := true;
  mem.Align := alClient;
  mem.Margins.Left := 10;
  mem.Margins.Right := 10;
  mem.Margins.Top := 10;
  mem.Margins.Bottom := 10;
  mem.ElementClassName := 'form-control';
  mem.Lines.Assign(WebListBox1.Items);

  pnl := TWebPanel.Create(frm);
  pnl.Parent := frm;
  pnl.Height := 40;
  pnl.Align := alBottom;

  btnOK := TWebButton.Create(pnl);
  btnOK.Parent := pnl;
  btnOK.Caption := 'OK';
  btnOK.Left := 400;
  btnOK.Top := 5;
  btnOK.Width := 90;
  btnOK.Height := 30;
  btnOK.Tag := mrOK;
  btnOK.ElementClassName := 'btn-primary';
  btnOK.OnClick := BtnClick;
  btnOK.Hint := 'Accept changes';
  btnOK.ShowHint := true;
  btnOK.Anchors := [akRight, akTop];

  btnCancel := TWebButton.Create(pnl);
  btnCancel.Parent := pnl;
  btnCancel.Caption := 'Cancel';
  btnCancel.Left := 500;
  btnCancel.Top := 5;
  btnCancel.Tag := mrCancel;
  btnCancel.Width := 90;
  btnCancel.Height := 30;
  btnCancel.OnClick := BtnClick;
  btnCancel.ElementClassName := 'btn';
  btnCancel.Hint := 'Exit dialog';
  btnCancel.ShowHint := true;
  btnCancel.Anchors := [akRight, akTop];

  if Assigned(frm.CaptionElement) then
  begin
    frm.CaptionElement.style.setProperty('background-color','#009FE4');
    frm.CaptionElement.style.setProperty('font-size','14pt');
  end;

  frm.ShowModal(@HandleDialogClose);
end;
What you see here is quite straightforward and almost 100% VCL like. A form is created, its size and position is set and then the various controls that should be hosted in the form are created. Noteworthy is that for the buttons an ElementClassName is set. When we have added Bootstrap support, we can use the Bootstrap 'btn' & 'btn-primary' class names for the buttons and 'form-control' for the memo. To add Bootstrap support, simply select from the project context menu in the IDE project manager "Manage JavaScript Libraries" and select Bootstrap. You can see that the buttons are also right-anchored, indicating the align and anchoring paradigm of the VCL is avaible for those Delphi developers wanting to use it. Notice also the access to the caption element. This is the HTML element (a span) that represents the caption of the form. By having access to the HTML caption element, this means we can fully use CSS to style it. Here just a simple background color and font size is applied but nothing would prevent you from further customization and even inserting extra HTML child elements in this caption.

The form is at last displayed with the ShowModal() method. Here is an important difference. In the browser, there are no blocking calls! It would be a very bad idea to have blocking methods in the browser. As we do not have the concept of blocking calls, we need an alternative way to capture the result of closing the "modal" form and that is by using a procedure as parameter. This procedure will be called when the form closes and will return the "modal" result set by the buttons on the form. From this procedure, we can get the contents of the TWebMemo on this form and assign these to the TWebListbox on the main form.

Finally, we also had to add some code to handle the button click to set the modal result and close the form. This is done by assigning the button.OnClick event handler and this event handler code is:

procedure TForm1.BtnClick(Sender: TObject);
var
  lForm: TWebForm;
begin
  lForm := TWebForm((Sender as TWebButton).Parent.Parent);
  lForm.ModalResult := (Sender as TWebButton).Tag;
  lForm.Close;
  lForm.Free;
end;
As you can see, we get access to the form by getting the parent of the TWebPanel that is the parent of the buttons. With the access to this form object, we can set the ModalResult and close it.

The end result looks like:


We hope these first tips are useful and we wish you a further enjoyable journey with TMS WEB Core. Our team loves your challenges, so get in touch and we look forward to assist and create from this more tips & tricks for TMS WEB Core, TMS XData or TMS FNC controls for creating modern web applications.


TMS to the rescue - Merging with TAdvRichEditor (guest article by Joe C. Hecht)

$
0
0


A customer needed an application that could insert a “blog like” post into the middle of a corporate HTML page, making a sandwich of sorts between a header and footer template. Further, they needed the application to provide complete text formatting and image insertion. The app needed to be WYSIWYG (what you see is what you get), targeted to users with no experience at writing web code.

This application had to be very easy to use, quick to write, and I needed to deliver results — fast!

Writing a real time HTML editor and viewer is no walk in the park. I have a lot of experience at writing RTF editors and converting the results to PDF, and have enough experience to know that the Microsoft Windows® RTF control has exactly what I need to get the job done. Hooking up a Microsoft Windows® RichEdit to a pile of controls to set attributes will easily require a thousand lines of code, and even more code will be needed for conversion to HTML. Even with all the RTF related code I have archived back over the years, there was no way I could get the job out quickly using the Microsoft Windows® RichEdit control.

I purchased the TMS Component Pack from tmssoftware.com. The TMS Component Pack contains a massive collection of over 400 different VCL controls. Included is the TAdvRichEditor control, along with a wide range of associated controls used to enhance the job of RTF editing.

Using a TAdvRichEditor with one of the RTF Editing Toolbars, within a few minutes, I not only had a gorgeous interface to show off, I was able to easily output the RTF’s results as both a HTML and a PDF stream. So far so good!

TMS Software has a large number of controls specifically designed to make short work of setting the attributes of the text and other elements available in a TAdvRichEditor. TMS Software has tool bars, ribbon bars, popup menus, a host of “Office” like controls, and even a spell checker! The available attribute settings were amazing, including the ability to define lists, list types, add special characters and images, adjusting alignments and fonts, along with setting all the available text attributes, including subscript, superscript, and custom indents. They even have controls to support emoticons!

Leveraging the TMS Component Pack, I was able to quickly deliver several working mock-ups of the app, each with a different look and feel, and impress the customer with both an amazingly fast turnaround and lots of great looking choices! Did I mention how “quickly”? In minutes!

The customer loved it! They handed out the apps to the users to try out, asked the users to take notes, and then called back with a very short “wish list” — and a contract! Cha-Ching! Sale!!

The customer chose the TAdvRichEditorFormatToolBar for setting the RTF’s attributes, and the matching TAdvRichEditorEditToolBar for loading, saving, cut, copy, paste, undo, and re-do. Perfect!

Now for the fun part! The wish list. It seemed simple enough, but knowing the internals of RTF editing, I have the experience to know that often enough, simple requests may not always be so easy.


The “wish list”

Wish lists usually border on fantasies. TMS Software did a great job, since all the major up front work was done.

This list was short, sweet and realistic.

  • Add a “Color Button” to show the overall RTF’s background color.
  • Show only the “web like” fonts “Arial”, “Courier new”, and “New Times Roman”.
  • Override the “Load” and “Save” buttons to customize how they work.

Easy enough, right?


Plan of attack

Every wish list item requires access to the TMS toolbar child controls. A trap will be set in during the FormCreate() method that will obtain references to the needed TMS toolbar child controls at run time, remove the “non-web” fonts from the font combo box, and dynamically override the events for “Load” and “Save” to provide the requested changes.


Item: Add a “Color Button” to set and show the overall background color

Adding an extra button to the toolbar was super easy. Right clicking on the toolbar produced a long list of available controls to add. The TAdvOfficeColorSelector was the perfect choice for consistency, as it matches the other controls used by the TAdvRichEditorFormatToolBar to set color properties and also contains all the functionality required to display a drop down color selector. The “SelectColor()” event of the new button will be used to apply the background color to the RTF control.


Clicking the background color button

The background color of the RTF control is set via its “Color” property. The color is applied to the overall background when nothing is selected, SelectStart is -1, and SelLength is zero. When something is selected, or SelectStart is not -1, the color property will set either the background color at the caret, or the item that is selected.

To set background color, the “SelectColor()” event of the new button must:

  • Save the caret and current selection (if any) in the RTF control.
  • Make sure nothing is selected in the RTF control.
  • Set the RTF’s SelectStart to -1 and SelectLength to 0.
  • Set the background color.
  • Restore the caret and selection (if any).

Finally, the TAdvRichEditor’s DoSelectionChanged() method is called to synchronize the RTF control and the associated tool bar controls with the editing changes made by the new background color button.


Item: Show only the “web like” fonts “Arial”, “Courier new”, and “New Times Roman”

No objects or pointers are stored in the TAdvOfficeFontSelector items.objects array, so the list items for unneeded fonts are safely removed from the TAdvOfficeFontSelector (in reverse order).


Item: Override the “Load” and “Save” buttons to customize how they work

The OnClick() events for these buttons will be totally replaced, allow for custom processing.


Setting the trap

In the FormCreate() method, FindRTFEditContols() is called, where the child controls of the “TAdvRichEditorFormatToolBar” and “TAdvRichEditorEditToolBar” toolbars are identified, and saved back (as required). If the needed controls are not found, FindRTFEditContols() returns false, an error message is displayed, and the application is terminated.

A call is then made to TrapRTFEditContols() to actually set the traps, where the events for the “Load” and “Save” buttons are replaced, and the unneeded “non-web fonts” are safely removed from the TAdvOfficeFontSelector.


OpenFile — Normally, a dialog box is displayed, allowing the user to load the RTF from a number of different file formats. Per the customer’s requirements, the RTF is simply re-loaded from the same file every time (if it exists), otherwise default settings are used and no further processing is required.

The title for the web page is conveniently stored in the “Author” property of the RTF file, where it is extracted from the RTF file and used to set the “Text” property of the “WebpageTitle” edit control.

The background color of the RTF control is obtained by selecting “nothing” and retrieving the value of the “Color” property of the RTF control, then using the value retrieved to set the “SelectedColor” property of the AdvOfficeBkColorSelector control.

Finally, the caret is positioned in front of the first character in the RTF control (with no selection), and the AdvRichEditor’s DoSelectionChanged() method is called to synchronize the RTF control and the associated tool bar controls (containing the new background color button).


SaveFile — Normally, a dialog box is displayed, allowing the user to save the RTF in a number of formats. Per the customer’s requirements, the RTF’s contents are saved as a “.rtf” file always to the same name (for later recall), and the RTF’s contents are also saved as an HTML string to be merged with a corporate header and footer HTML template, producing a completed web page. The web page title is replaced in the “corporate header” with the contents of the “WebpageTitle” edit control, and the “Title” is saved as the “Author” property in the “.rtf” file (for later recall when the .rtf file is reloaded).

A “TAdvRichEditorMiniHTMLIO” component is used to covert the RTF’s contents to HTML. Setting the “PlainHTML” property causes no output of an HTML or body tag. An HTML DIV tag is used to surround the contents, using an inline style with the default font, size, and background color. Using a DIV tag allows additional style properties to be added (for example, additional margins and padding). Images used in the RTF are set to encode as “HTML inline images”, requiring no external images to be gathered for publishing. The end result is a single, self-contained web page that is ready to upload.


TAdvRichEditorProtectedAccess

TMS Software does a great job at making RTF easy. TMS Software wrote their own RTF controls, and have versions available for almost every platform on the planet! They have RTF controls for Delphi®, C++Builder®, and Lazarus, and available on the Linux®, OS X®, and Microsoft Windows® platforms. At the same time, TMS Software was very careful to implement a UI interface that closely follows the Microsoft Windows® RTF control (for UI consistency).

TMS Software uses brilliantly simple interfaces to wrap very complex controls. You can’t have everything. A simple interface sometimes means you may have to roll up your sleeves to get to a nitty-gritty internal.

In working with the internals of the TAdvRichEdit and associated controls, I found many of the protected methods and properties to be very useful. You may be thinking the same thing!

Adding custom functionality to a control often requires the need to write (and install) a descending class to access the protected methods and properties, however, simply declaring a descending class and casting an object reference works just as well (if nothing is added). This concept is known as a THack() class.

If I recall correctly, THack() was originally conceived in the early days of Delphi at Borland, by two bright young engineers I had the honor of working with: Andrew Kern and David Powell.

This concept is demonstrated by the use of the declared “TAdvRichEditorProtectedAccess” class, and is used to access the AdvRichEditor’s protected DoSelectionChanged() method.

Know that protected methods are not intended for use by the application. They are intended for component writers, and are internal to the object. You must be extremely careful in using them. Wherever possible, use public and published methods and properties as protected methods and properties are usually not documented, and the implementation (and even the existence) of these internals are subject to change at any time (and without warning).


Taking it further

The example presented demonstrates a great starting place for both the use and extension of only a few of the large number TMS Software’s RTF based controls available in the TMS Component Pack. Additional possibilities for use and enhancements of these controls are seemingly unlimited. In fact, I have a very excellent real time aware RTF edit popup menu that I plan to interface. In addition to the TMS Software RTF based controls, many other TMS controls come to mind that can be immediately (and easily) leveraged (such as the large number of TMS HTML based controls). TMS Software also provides for importing and exporting to and from many additional formats (such as PDF), support for many different image and vector formats, and also has database aware versions for most TMS controls.


Code Notes

HTML header and footer files used in the published example contain our own web code [plug].

The style used is typical of a Borland Pascal example, with function separator “comment” lines added that are similar to what is used by C++Builder® and what is displayed by default in the Lazarus IDE.

Three exceptions to the “Borland style” are used:

  • Code is always blocked using the rule “Never a then without a begin”.
  • Parentheses enclose every mathematical, logical, and bit-wise operation (for absolute clarity).
  • Function names are assigned rather than using the Delphi® automatic function “result” variable (allowing code to easily port to other compilers using a “native” code compile mode).

Most of my coding style comes from many years of experience, and a good read of Steve McConnell’s widely acclaimed books ‘Code Complete’ and ‘Code Complete 2’ ISBN 978-0-7356-1967-8 (2nd ed.)


Joe C. Hecht Author’s Lebenslauf

Joe C. Hecht is a software engineer that specializes in graphics engines, print drivers, PDF, SDK design, C++, and Delphi®.

Joe hails from Borland’s Delphi® group, where he earned the moniker “TJoe”.

His works include several award winning desktop publishing software titles including ‘TypeStudio’, ‘Effects Specialist’, and ‘OptiScript’.

Joe was a featured writer for the ‘Windows Tech Journal’, and went on to author many technical white papers during his time at Borland. He is acknowledged as a contributing author in many books that have been published on the subjects of computer graphics, programming, and Delphi®.

Joe participated in the 3D gaming engines used by Disney Interactive and 7th Level to produce many best-selling titles including Disney's ‘The Hunchback of Notre Dame’ and ‘Timon & Pumbaa's Jungle Games’, along with ‘Monty Python & the Quest for the Holy Grail’, ‘Monty Python's Complete Waste of Time’, ‘Ace Ventura’, ‘Battle Beast’, and Howie Mandel's ‘Adventures in Tuneland’.

Joe is the lead engineer for Code4Sale LLC and a long time Embarcadero Technology Partner. His current projects include the open source ÜberPDF™SDK, the GX Graphics™ high speed render engine, and cross platform development for Microsoft Windows®, OS X®, Linux®, Mobile, and Embedded.

When not coding, Joe can be found sailing the clear waters of Florida’s Emerald Coast aboard his sloop El deseo de padre.

Joe is actively soliciting quality code and other works in need of authorship and can be contacted at: https://code4sale.com/email/JoeHecht/


Save a tree

A PDF version of this article (including the complete source code listing) is available for download.


Project source code

The complete project's source files are available for download as a .zip file.

A source listing for the project's main unit is listed below.


The application

The Application


The HTML result
(With header and footer templates)

The HTML Result


The project's main unit

HtmlRTFMergerMainUnit.pas

unit HtmlRTFMergerMainUnit;
//------------------------------------------------------------------------------


//------------------------------------------------------------------------------
interface
//------------------------------------------------------------------------------


//------------------------------------------------------------------------------
uses
//------------------------------------------------------------------------------
  Winapi.Windows,Winapi.Messages, System.SysUtils, System.Variants,
  System.Classes, Vcl.Graphics, Vcl.Controls, Vcl.Forms, Vcl.Dialogs,
  Vcl.StdCtrls, Vcl.ExtCtrls,
  //----------------------------------------------------------------------------
  ShellApi, // Needed to launch the system web browser
  AdvOfficeComboBox,  // Needed to acccess TMS toolbar comboboxes
  AdvRichEditorMiniHTMLIO, // Needed for specific HTML output
  //----------------------------------------------------------------------------
  AdvToolBar,
  AdvToolBarExt,
  AdvRichEditorToolBar,
  AdvRichEditorBase,
  AdvRichEditor,
  AdvScrollControl,
  AdvOfficeSelectors,
  AdvGlowButton;
//------------------------------------------------------------------------------


//------------------------------------------------------------------------------
// Used to access the protected methods of TAdvRichEditor.
//------------------------------------------------------------------------------
type TAdvRichEditorProtectedAccess = class(TAdvRichEditor);
//------------------------------------------------------------------------------


//------------------------------------------------------------------------------
type
//------------------------------------------------------------------------------
  TForm1 = class(TForm)
    EditWebpageTitle: TEdit;
    AdvRichEditor: TAdvRichEditor;
    AdvRichEditorEditToolBar: TAdvRichEditorEditToolBar;
    AdvRichEditorFormatToolBar: TAdvRichEditorFormatToolBar;
    AdvOfficeBkColorSelector: TAdvOfficeColorSelector;
    procedure FormCreate(Sender: TObject);
    procedure FormShow(Sender: TObject);
    procedure AdvOfficeBkColorSelectorSelectColor(Sender: TObject;
                                                  AColor: TColor);
  protected
    RTFDefaultFontName: string;
    RTFDefaultFontSize: integer;
    TMSOpenFileButton: TAdvCustomGlowButton;
    TMSSaveFileButton: TAdvCustomGlowButton;
    TMSFontListComboBox: TAdvOfficeFontSelector;
    TMSFontSizeComboBox: TAdvOfficeFontSizeSelector;
    function FindRTFEditContols() : boolean;
    procedure TrapRTFEditContols();
    procedure NewTMSOpenFileButtonOnClick(Sender: TObject);
    procedure NewTMSSaveFileButtonOnClick(Sender: TObject);
  public
  end;
//------------------------------------------------------------------------------


//------------------------------------------------------------------------------
var
  Form1: TForm1;
//------------------------------------------------------------------------------


//------------------------------------------------------------------------------
implementation
//------------------------------------------------------------------------------
{$R *.dfm}
//------------------------------------------------------------------------------


//------------------------------------------------------------------------------
procedure TForm1.FormCreate(Sender: TObject);
//------------------------------------------------------------------------------
begin
  // Set the default font and size for AdvRichEditor.
  RTFDefaultFontName := 'Arial';
  RTFDefaultFontSize := 12;
  AdvRichEditor.Font.Name := RTFDefaultFontName;
  AdvRichEditor.Font.Size := RTFDefaultFontSize;
  // Find the RTFEditContols
  if (not(FindRTFEditContols())) then begin
    ShowMessage('RTFEditContols not found - terminating');
    Application.Terminate();
  end;
  // Trap the RTFEditContols
  TrapRTFEditContols();
  // Open the RTF file (if it exists)
  NewTMSOpenFileButtonOnClick(self);
end;
//------------------------------------------------------------------------------


//------------------------------------------------------------------------------
procedure TForm1.FormShow(Sender: TObject);
//------------------------------------------------------------------------------
begin
  AdvRichEditor.SetFocus();
  AdvRichEditor.SelectText(0, 0);
end;
//------------------------------------------------------------------------------


//------------------------------------------------------------------------------
function TForm1.FindRTFEditContols() : boolean;
//------------------------------------------------------------------------------
var
  idx: integer;
  aControl: TControl;
begin
  // Get a reference to the open and save buttons in AdvRichEditorEditToolBar
  TMSOpenFileButton := AdvRichEditorEditToolBar.GetButton(integer(btFileOpen));
  TMSSaveFileButton := AdvRichEditorEditToolBar.GetButton(integer(btFileSave));
  // Get a reference to the font ComboBoxes in AdvRichEditorEditToolBar
  for idx := 0 to (AdvRichEditorFormatToolBar.ControlCount - 1) do begin
    if ((Assigned(TMSFontListComboBox)) and
        (Assigned(TMSFontSizeComboBox))) then begin
      break;
    end;
    aControl := AdvRichEditorFormatToolBar.Controls[idx];
    if (aControl is TAdvOfficeFontSelector) then begin
      TMSFontListComboBox := TAdvOfficeFontSelector(aControl);
      continue;
    end;
    if (aControl is TAdvOfficeFontSizeSelector) then begin
      TMSFontSizeComboBox := TAdvOfficeFontSizeSelector(aControl);
      continue;
    end;
  end;
  // Make sure all references are valid
  if (not((Assigned(TMSOpenFileButton)) and
          (Assigned(TMSSaveFileButton)) and
          (Assigned(TMSFontListComboBox)) and
          (Assigned(TMSFontSizeComboBox)))) then begin
    FindRTFEditContols := false;
    exit;
  end;
  FindRTFEditContols := true;
end;
//------------------------------------------------------------------------------


//------------------------------------------------------------------------------
procedure TForm1.TrapRTFEditContols();
//------------------------------------------------------------------------------
var
  idx: integer;
  fontName : string;
begin
  // Set the new OnClick events for the OpenFile and SaveFile buttons
  TMSOpenFileButton.OnClick := NewTMSOpenFileButtonOnClick;
  TMSSaveFileButton.OnClick := NewTMSSaveFileButtonOnClick;
  // Safely remove all non web compatible fonts from the FontListComboBox
  for idx := (TMSFontListComboBox.Items.Count - 1) downto 0 do begin
    fontName := TMSFontListComboBox.Items[idx];
    if ((fontName <> 'Arial') and
        (fontName <> 'Courier New') and
        (fontName <> 'Times New Roman') and
        (not(Assigned(TMSFontListComboBox.Items.Objects[idx])))) then begin
      TMSFontListComboBox.Items.Delete(idx);
    end;
  end;
end;
//------------------------------------------------------------------------------


//------------------------------------------------------------------------------
procedure TForm1.AdvOfficeBkColorSelectorSelectColor(Sender: TObject;
                                                     AColor: TColor);
//------------------------------------------------------------------------------
var
  selection : TSelection;
  caret : TCaret;
begin
  AdvRichEditor.SetFocus();
  // Save the selection (if any)
  selection := TSelection.Create();
  selection.Assign(AdvRichEditor.Selection);
  // Save the caret
  caret := TCaret.Create();
  caret.Assign(AdvRichEditor.Caret);
  // Select nothing and set SelStart to -1 to set the RTF's background color
  AdvRichEditor.UnSelect();
  AdvRichEditor.SelStart := -1;
  AdvRichEditor.SelLength := 0;
  // Set RTF's background color
  AdvRichEditor.Color := AColor;
  // Restore the selection (if any)
  AdvRichEditor.Selection.Assign(selection);
  selection.Free();
  // Restore the caret
  AdvRichEditor.Caret.Assign(caret);
  caret.Free();
  // Update AdvRichEditor and the toolbar
  TAdvRichEditorProtectedAccess(AdvRichEditor).DoSelectionChanged();
end;
//------------------------------------------------------------------------------


//------------------------------------------------------------------------------
procedure TForm1.NewTMSOpenFileButtonOnClick(Sender: TObject);
//------------------------------------------------------------------------------
begin
  if (not(FileExists('__AdvRichEditContents.rtf'))) then begin
    exit;
  end;
  AdvRichEditor.LoadFromFile('__AdvRichEditContents.rtf');
  // The web-page title is stored in the AdvRichEditor.Author property
  EditWebpageTitle.Text := Trim(AdvRichEditor.Author);
  // Select nothing and set SelStart to -1 to get the RTF's background color
  AdvRichEditor.UnSelect();
  AdvRichEditor.SelStart := -1;
  AdvRichEditor.SelLength := 0;
  AdvOfficeBkColorSelector.SelectedColor := AdvRichEditor.Color;
  // Set the caret to the first text char (if any - with no selction)
  AdvRichEditor.SelectText(0, 0);
  // Update AdvRichEditor and the toolbar
  TAdvRichEditorProtectedAccess(AdvRichEditor).DoSelectionChanged();
end;
//------------------------------------------------------------------------------


//------------------------------------------------------------------------------
procedure TForm1.NewTMSSaveFileButtonOnClick(Sender: TObject);
//------------------------------------------------------------------------------
var
  htmlSL: TStringList;
  htmlOutText: string;
  uppercaseTestString: string;
  posStart: integer;
  posEnd: integer;
  advRichEditorMiniHTMLIO: TadvRichEditorMiniHTMLIO;
  rtfContentsAsHtml: string;
  backgroundRGBColor: DWORD;
begin
  //----------------------------------------------------------------------------
  // Produce an HTML page by merging:
  // _htmlBegin.txt + rtfContentsAsHtml + _htmlEnd.txt
  // Replace '<title>Title</title>' in _htmlBegin.txt with EditTitle.Text.
  // Replace ' ' in rtfContentsAsHtml with spaces.
  // Add <DIV> tag of RTFBackgroundColor and default Font to rtfContentsAsHtml.
  // Save with Unix line endings, encoded in UTF-8
  //----------------------------------------------------------------------------
  // Create a stringlist to load and save html code with
  htmlSL := TStringList.Create();
  // Load the HTML Header text
  htmlSL.LoadFromFile('_htmlBegin.txt');
  htmlOutText := htmlSL.Text;
  // Make an uppercase version of htmlOutText to search for the title tag
  uppercaseTestString := UpperCase(htmlOutText);
  // Search for the title tag and replace it (if found)
  posStart := pos('<TITLE>', uppercaseTestString);
  if (posStart > 0) then begin
    posEnd := pos('</TITLE>', uppercaseTestString);
    if (posEnd > 0) then begin
      // delete and insert to htmlOutText
      delete(htmlOutText,
             posStart,
             (posEnd - posStart));
      insert('<title>' + Trim(EditWebpageTitle.Text), htmlOutText, posStart);
    end;
  end;
  // Create a advRichEditorMiniHTMLIO to get the RTF contents as HTML
  advRichEditorMiniHTMLIO := TadvRichEditorMiniHTMLIO.Create(nil);
  advRichEditorMiniHTMLIO.RichEditor := AdvRichEditor;
  advRichEditorMiniHTMLIO.PlainHTML := true;
  advRichEditorMiniHTMLIO.InlineImages := true;
  // Get the RTF's HTML text
  rtfContentsAsHtml := advRichEditorMiniHTMLIO.AsString();
  // Replace '&nbsp;' with spaces.
  posStart := pos('&nbsp;', rtfContentsAsHtml);
  while (posStart > 0) do begin
    delete(rtfContentsAsHtml, posStart, length('&nbsp;'));
    insert(#32, rtfContentsAsHtml, posStart);
    posStart := pos('&nbsp;', rtfContentsAsHtml);
  end;
  // Add rtfContentsAsHtml to htmlOutText, adding a <DIV> tag around the
  // rtfContentsAsHtml with the background color, default font, and font size.
  backgroundRGBColor := ColorToRGB(AdvOfficeBkColorSelector.SelectedColor);
  htmlOutText := htmlOutText +
                 '<DIV style="background-color:#' +
                 IntToHex(GetRValue(backgroundRGBColor), 2) +
                 IntToHex(GetGValue(backgroundRGBColor), 2) +
                 IntToHex(GetBValue(backgroundRGBColor), 2) +
                 '; font-family: ' +
                 RTFDefaultFontName +
                 '; font-size:' +
                 IntToStr(RTFDefaultFontSize) +
                 'pt;">' +
                 rtfContentsAsHtml +
                 '</DIV>';
  // Load the HTML Footer text
  htmlSL.LoadFromFile('_htmlEnd.txt');
  // Add the HTML Footer text to the htmlOutText
  htmlOutText := htmlOutText + htmlSL.Text;
  // Save the htmlOutText with Unix line endings, encoded in UTF8.
  htmlSL.Text := htmlOutText;
  htmlSL.LineBreak := #10;
  htmlSL.SaveToFile('_htmlOut.htm', TEncoding.UTF8);
  htmlSL.Free();
  // Save the WebpageTitle in AdvRichEditor.Author
  AdvRichEditor.Author := Trim(EditWebpageTitle.Text);
  // Save the RTF
  AdvRichEditor.SaveToFile('__AdvRichEditContents.rtf');
  // Open the resulting HTML file in the default browser
  ShellExecuteW(self.Handle,
                'open',
                PWChar(ExpandFileName('_htmlOut.htm')),
                nil,
                nil,
                SW_SHOWNORMAL);
end;
//------------------------------------------------------------------------------


//------------------------------------------------------------------------------
end.


Copyright © 2018 by Joe C. Hecht - All rights reserved

Thanks Joe for a great article!

TMS WEB Core v1.0 Brescia tips & tricks part 2

$
0
0


Even though it is summer & vacation time for many, we make time for two more super useful tips & tricks for everyone developing web client applications with TMS WEB Core.

Inserting controls as child of HTML elements

The first tip concerns dynamically creating a web control as child of an existing HTML element. Normally in a VCL application, when you create a new control, a Delphi developer typically adds the control as child control of a form or container control by setting the Control.Parent property. In a TMS WEB Core application, you can do exactly the same. This code snippet inserts a button in a panel:

var
  btn: TWebButton;

begin
  btn := TWebButton.Create(WebPanel1);
  btn.Parent:= WebPanel1;
  btn.OnClick := myClickHandler;
end;
Every seasoned Delphi developer immediately sees that this is 100% identical to what one would do a in VCL Windows application.
But in a TMS WEB Core application, a web page can not only consist of TMS WEB Core web controls, it can also involve HTML elements from a HTML template or HTML elements that are just part of a more complex TMS WEB Core web control. So, what if we wanted to insert a web control that is a child of a HTML element? TWebControl.Parent is of the type TControl and a HTML element on the page is of the type TJSElement, so clearly, we cannot use the control.Parent property.
TMS WEB Core however comes with an easy and intuitive solution. Other than control.Parent, every web control has a second property control.ParentElement: TJSElement. With this property we can as such make a web control a child of any HTML element.

We will apply this technique to dynamically insert badges in a column of a table, represented by the TWebTableControl. The TWebTableControl is a wrapper around the HTML table and as such it consists of TR and TD HTML elements. The TD element of a table cell is conveniently accessible via WebTableControl.CellElements[Col, Row]: TJSElement. But when we load JSON data in a TWebTableControl, while the table is built-up and the HTML elements are created, TWebTableControl fires the OnGetCellChildren event with event signature:
procedure TForm1.WebTableControl1GetCellChildren(Sender: TObject; ACol,
  ARow: Integer; AField: TField; AValue: string; AElement: TJSHTMLElement);
begin

end;
It returns the column, row, possibly a DB field (when used in the DB-bound TWebDBTableControl), the cell value and AElement which is the HTML TD element of the table cell and exactly what we need to insert a new control into a table cell.

As such, we can write:
procedure TForm1.WebTableControl1GetCellChildren(Sender: TObject; ACol,
  ARow: Integer; AField: TField; AValue: string; AElement: TJSHTMLElement);
var
  badge: TWebBadge;
begin
  if (ACol = 2) and (ARow > 0) then
  begin
    badge := TWebBadge.Create(Self);
    badge.Text := AValue;
    badge.ElementFont:= efCSS;
    badge.ElementClassName := 'badge badge-success badge-pill';
    AElement.innerHTML:= '';
    badge.ParentElement := AElement;
  end;
end;
The result for a TWebTableControl loading JSON via WebTableControl.LoadFromJSON() is :


Using the versatile HTML lists

The HTML list element UL with list items LI is an extremely versatile HTML element, especially when it is in the hands of CSS (like Bootstrap) to transforms such lists into all kinds of magic. With the TWebListControl, TMS WEB Core offers a convenient class to manage such lists. TWebListControl exposes a TListItem collection. What is nice is that the TListItem class has in turn an Items: TListItems collection that can hold sub items etc... When not using CSS, the TWebListControl is used in the following way:
TWebListControl.Items.Add.Text := 'Item 1';
TWebListControl.Items.Add.Text := 'Item 2';
TWebListControl.Items.Add.Text := 'Item 3';
and it results in:

  • Item 1
  • Item 2
  • Item 3

Now, let's unleash the power of CSS, in particular Bootstrap here to magically transform such list control in all kinds of nice web UI. First add the Bootstrap library references to your project with the JavaScript Library manager. To do this, right-click the project in the Delphi IDE project manager and select "Manage JavaScript Libraries" and activate Bootstrap 4.1.1 as well as jQuery 3.3.1. Now we can start exploring how the strength of Bootstrap can be applied to the TWebListControl:

Breadcrumb  https://getbootstrap.com/docs/4.1/components/breadcrumb/


To show a breadcrumb, we set WebListControl.Style := lsBreadcrumb and then add items:
procedure TForm1.WebButton2Click(Sender: TObject);
begin
  WebListControl1.Style := lsBreadcrumb;
  WebListControl1.Items.Add.Text := 'Main';
  WebListControl1.Items.Add.Text := 'Products';
  WebListControl1.Items.Add.Text := 'Software';
  WebListControl1.Items.Add.Text := 'Web development';
  WebListControl1.Items.Add.Text := 'TMS WEB Core';
end;
Thanks to the Bootstrap styling, this results in:

Pagination  https://getbootstrap.com/docs/4.1/components/pagination/

The pagination style turns a list of items into a row of selectable link blocks. The code to create an example list is:
procedure TForm1.WebButton2Click(Sender: TObject);
begin
  WebListControl1.Style := lsPagination;
  WebListControl1.Items.Add.Text := 'Customers';
  WebListControl1.Items.Add.Text := 'Products';
  WebListControl1.Items.Add.Text := 'Orders';
  WebListControl1.Items.Add.Text := 'Stock';
  WebListControl1.Items[0].Active := true;
end;
In the browser, this looks like:

Tabs  https://getbootstrap.com/docs/4.0/components/navs/

The tabs style turns a list of items into a row of tabs. The code to create an example list is exactly the same as for pagination except the style is set to lsTabs:
procedure TForm1.WebButton2Click(Sender: TObject);
begin
  WebListControl1.Style := lsTabs;
  WebListControl1.Items.Add.Text := 'Customers';
  WebListControl1.Items.Add.Text := 'Products';
  WebListControl1.Items.Add.Text := 'Orders';
  WebListControl1.Items.Add.Text := 'Stock';
  WebListControl1.Items[0].Active := true;
end;
With just one property changed, the list now becomes:

List-Group  https://getbootstrap.com/docs/4.0/components/list-group/

Bootstrap defines the 'List-Group' and 'List-Group-Item' CSS class. We set the 'List-Group' CSS class name to TWebListControl.ElementListClassName. Then for each TListItem, set TListItem.ItemClassName := 'List-Group-Item'. The result becomes


The List-Group has a few extra cool features. Let's introduce some sub items, conveniently inserted in Pascal code with listitem.Items.Add. Here we also use the Bootstrap's collapse feature https://getbootstrap.com/docs/4.0/components/collapse/ In the list group, this means that with the collapse feature, the item having sub items can collapse or expand the list of sub items. For the TWebListControl TListItem, this is enabled per item with the AutoCollaps boolean property. In the list group we can further set items as active items to make these appear highlighted. And as finishing touch, let's add some badge controls introduced in the first tip for the subitems.We set the parent HTML element of the badge control to the list control item HTML element, exposed via ListItem.ListElement.
Putting everything together, the code becomes:

var
procedure TForm1.WebButton3Click(Sender: TObject);
var
  li: TListItem;
  badge: TWebBadge;
  i: integer;
begin
  WebListControl1.Style := lsListGroup;
  WebListControl1.DefaultItemLinkClassName := '';
  WebListControl1.DefaultItemClassName := 'list-group-item list-group-item-action  d-flex justify-content-between align-items-center';

  li := WebListControl1.Items.Add;
  li.Text := 'Mercedes';
  li.Active := true;
  li.AutoCollaps := true;
  li.Items.Add.Text := 'S class';
  li.Items.Add.Text := 'SL class';
  li.Items.Add.Text := 'E class';
  li.Items.Add.Text := 'AMG GT class';

  WebListControl1.Items.Add.Text := 'Audi';
  WebListControl1.Items.Add.Text := 'Porsche';
  WebListControl1.Items.Add.Text := 'BMW';

  for i := 0 to li.Items.Count - 1 do
  begin
    badge := TWebBadge.Create(Self);
    badge.ElementClassName:= 'badge badge-warning badge-pill';
    badge.Text := inttostr(random(10));
    badge.ParentElement := TJSHTMLElement(li.Items[i].ListElement);
  end;
end;
Rendered in the browser with Bootstrap, this spectacularly becomes:


Interested in fast RAD component based web client application development with Delphi? Get started today: TMS WEB Core, TMS FNC UI web-enabled controls, web-enabled TMS XData, the first parts under the TMS RADical WEB umbrella are all available separately now or as part of the TMS-ALL-ACCESS subscription!

Building Android/iOS Native App from TMS Web Core/TMS XData application using PhoneGap

$
0
0

Since TMS Web Core generates pure stand-alone HTML/JS/CSS applications, and because that applications can be fully responsive, I have decided to do a quick experiment on how to convert the TMS Web Core application to a native mobile application using PhoneGap tool, more specifically PhoneGap Build.

My intention was to turn the XData Music demo (https://app.devgems.com/xdata/music/app) into a mobile application.

I have never used PhoneGap before. It's a software development framework from Adobe used to develop mobile applications using web-development technologies like HTML, CSS and JS. PhoneGap Build is a cloud service that goes further and do all the job of creating such application for you, instead of requiring you to install PhoneGap in your computer and configure it.

So what I did was signing up to PhoneGap Build - I could just login with my Google account, and clicked "New App". I then got the following screen:


What I did then was just zip the folder with html/js/css files from XData Music demo and upload it to PhoneGap using the "upload a .zip file" button. And that's it. Well, not exactly that. Since I tried it on iOS besides Android, I still had to deal with provisioning and certificate stuff, sending it to PhoneGap so it could generate the iOS app according to Apple guidelines. But after that, it provided me with links to download my mobile application for iOS, Android and - mind you - Windows Phone.

The whole process took literally 30 minutes. Most of it was just dealing with the Apple provisioning and certificate stuff. Here is a video of the mobile application running on my iPhone.


Larry's To Do List: a tuturial on using TMS WEB Core

$
0
0

Larry’s To Do List (guest article)

Introduction.

This is a tutorial describing my journey learning TMS Web Core from TMS Software. I’m a Delphi / Pascal developer who started writing Pascal back in the early Turbo Pascal days and then moved on to Delphi when it was first released. For the last 20 plus years I’ve been writing Windows accounting apps for my clients, using many of TMS Software's great components.

A few years back, with the advent of mobile devices, my clients started requesting that pieces of the software be accessible from their smart phones and tablets. I had tried many approaches but was struggling with the way things are handled on the web vs Windows. Of late I’ve been playing with Bootstrap, jQuery using Ajax to communicate with PHP backends. But JavaScript wasn’t my “native” language. So, when TMS Web Core came out I was a pretty happy guy. At last I would be able to put some of my apps onto the web.

As a way of learning TMS Web Core I decided to write a small app to keep track of my To Do’s. I’m a list maker who at the start of each day reviews what needs doing. This hand-written list has the Date Due, a Description and the Priority and usually which client it’s for. And when the task is complete, I check it off as being done. With this in mind, I decided to create a simple MySQL database named “todos” with initially a single table “todolist”. And use TMS Web Core with Bootstrap 4 and PHP to maintain this list.

As I was working on this project the thought came to mind that maybe other Delphi developers could use this project as a way for them to learn TMS Web Core. It’s a project in progress, as I’m still learning the in’s and out’s of TMS Web Core.

Sample screens.


Above is the main screen. The app uses TMS Web Core with various elements linked to the Bootstrap 4 CSS using primarily “ElementId” and “ElementClass” properties in the components of TMS Web Core. When you click “Edit”, you’ll get the screen below.

Here the TMS Web Core components are merged with a Bootstrap 4 form to produce the results shown.

Briefly the “Date Due” uses the component “TWebDateTimePicker” linked to a “form-group” item on the Bootstrap 4 form. “Priority” uses the “TWebComboBox” linked to a “select” form item on the Bootstrap 4 form.

The “Post” and “Cancel” buttons are “TWebButton” components linked to Bootstrap 4 styled buttons with “OnClick” events to handle the Posting or Cancelling of the information.

The initial templates I used are at the website “Start Bootstrap”. They are an “MIT” license. Here’s the link:

Start Bootstrap

I downloaded these templates and placed on my external drive and then copied the necessary html, JavaScript and CSS into my run time folders. All these files are on the run time zip I’ll be providing.

Please refer to a description of the folder usage later in this tutorial for more information.

The database.

MySQL is used to store the table “todolist”.

Here is the definition of the “todolist” table:

		DROP DATABASE IF EXISTS todos;
		CREATE DATABASE todos;
		USE todos;
		DROP TABLE IF EXISTS todolist;
		CREATE TABLE todos.todolist (
		  Id INT(11) NOT NULL AUTO_INCREMENT,
		  Description VARCHAR(255) DEFAULT NULL,
		  Complete INT(1) DEFAULT NULL,
		  Priority INT(11) DEFAULT NULL,
		  DateDue DATE DEFAULT NULL,
		  PRIMARY KEY (Id)
		)
		ENGINE = INNODB
		AUTO_INCREMENT = 1
		CHARACTER SET utf8
		COLLATE utf8_general_ci
		ROW_FORMAT = DYNAMIC;
	

Nearly all tables I use in my apps have a field named “Id”, which is the primary key and is “auto increment”. Using this method it’s very easy to link tables on queries.

The field “Complete” is treated as a Boolean with zero indicating it’s still open and one indicating complete.

If there was going to be a large amount of data, I would also be defining alternate keys. But for the tutorial, I’m keeping it as simple as possible.

Delphi source files.

I created a folder named “Tutorials” and within it a folder named “ToDo1”. In the “TutorialsToDo1” folder are the following source files:

The next sections will briefly describe the files. For further information please refer to the comments in the source.

Index.html

This file contains skeleton html. This file was modified for the Bootstrap 4, jQuery components. Here are the key parts:

Main.pas / Main.dfm / Main.html

This the main screen which contains the menu sidebar, plus a panel that acts as a parent to sub-forms. The “ElementId” properties on “Main.frm” are linked to html “id’s” in the “Main.html”.

Here’s the form:

Here’s the form after being merged with the html:

Pretty neat. Here’s what is in Main.html for “Refresh To Do’s”:

Note the span above with the id “main.menu.todo.list”. Here is the Delphi side:

When the Main form is opened, TMS Web Code merges these items to render the page.

View.ToDo.List.pas / View.ToDo.List.dfm / View.ToDo.List.html

This form is where the To Do items are listed in a Bootstrap 4 table. The form is embedded as a sub-form on the panel container in “Main.frm”. Please to the screen shots above which shows the embedded form in the Main container panel.

Here is Main.html and where the embedded form is placed:

Here is View.ToDo.List.html:

The above html is merged with “main.container” to show the list of To Do’s.

Within this form is a “TWebTableControl” named DataGrid. When this form is created, it calls the PHP script todolist.php.

Here is the call that is made to the php script:

When the “LoadFromJSON” is made the URL looks like this:

todolist.php builds a JSON response using the criteria passed as shown above. Then encodes the JSON response in PHP as:

Here is a sample of the JSON returned:

“Id” shown above becomes Column zero in DataGrid, “DateDue” becomes Column 1 in DataGrid, etc. Here’s what it looks like once loaded:

You’ll notice that “Id” is not really showing. Instead is a Bootstrap Button. This is accomplished with the “OnGetCellChildren” event that is part of “TWebTableControl”. Here's the code:

If the column passed is Column zero, “AValue” contains the “Id” of the To Do item being loaded. A "TWebButton" is created. The contents in Column zero are replaced with a Bootstrap Button and “Id” is placed in “TWebButton.Tag”. At this point when you click on one of the Edit buttons, you’ll be able to retrieve the To Do item’s Id and in turn create the form “EditToDoItem” and pass the Id to the form. The editing process is described in the next section. Here’s the code that does this:

The “Sender: TObject” above is the Edit button. The “Tag” contains the “Id” of the To Do item. When “EditForm” is created it uses “@AfterCreate” that is called once the form is created. And in “AfterCreate” a call is made to load the To Do item’s information. At this point the Edit form is shown via “EditForm.ShowModal”.

Edit.ToDo.Item.pas / Edit.ToDo.Item.dfm / Edit.ToDo.Item.html

This is a popup modal form where you can add new items and edit existing items. This form is created when you click the “Edit” button to edit existing To Do’s or when you click “New To Do” on the main form. Here’s the form:

Here’s the form after being merged with the html:

When the form is created to edit a To Do, “gettodoitem.php” is called passing the Id of the To Do item this way:

The “ToDoRequest” above is a “TWebHttpRequest” component. Here is a sample URL passed to “gettodoitem.php”:

Here is the JSON response:

Part of a “TWebHttpRequest” component is the event “OnResponse”. One of the variables passed to this event is the Response which is the JSON response shown above. Here I use TMS’ JSON to decode and place the values into the form:

Once the information is entered, you will press “Post”. This button is labeled “PostBtn” and has an event associated with it, which takes the information off the form and builds arguments which are then passed to “posttodoitem.php” which updates the To Do list data. The call is made here:

What I used.

Delphi and TMS Web Core.

I’m using Delphi Tokyo (10.2.2) with TMS Web Core. I assume you have both Delphi and TMS Web Core already installed.

MySQL

I separately downloaded and installed the MySQL community edition. Please note, Apache as described below, now comes with “MariaDB” instead of MySQL, thus the separate download. Here is the link to the MySQL community edition:

MySQL download

Apache and PHP.

I’m using MySQL and Apache (with PHP) to handle the web server and database. As noted I installed MySQL separately. Here is a link to “XAMPP” along with instructions for installation:

Apache download

dbForge Studio Express for MySQL from Devart.

Apache “XAMPP” comes with “PhpMyAdmin”. This is just my opinion, but I think it’s clunky. I’ve been using DevArt’s “UniDac” components in my Delphi apps for quite some time and like the way I can easily switch between MySQL and SQL Server. As an alternative to “PhpMyAdmin” I use their Studio Express to maintain the MySQL databases. Here is the link:

dbForge Studio download

Note, select the download for the Express version.

Folders used.

Source folders.

The Delphi source for this project is on my “C:” drive and is located here:


Source download

Note "todolist-create.sql" is also on this download. Use it to create your "todo" database.

Run time folders.

The Apache run times are installed on my “C:” drive at the standard XMAPP location:

Runtime download

Conclusion.

I hope this has been useful. If there are suggestions, bugs found, etc, you can reach me at larry@lwadsworth.com Based on reception, I might create a version two of the tutorial, which would have Categories for the To Do’s. This way you would be able have you items categorized, such as “Personal”, “Client” To Do’s.

Thanks again,

Larry Wadsworth


TMS FNC UI Pack v2.3 is here and brings 5 new UI controls

$
0
0

We continue on our mission to make TMS FNC UI controls not only the UI control set that you can put to work everywhere as Delphi/Pascal developer but also the most comprehensive UI control set for your toolkit.
For those not yet familiar with 'FNC' controls, these are what we call Framework Neutral Components. This means that these UI controls can be simultaneously used with different frameworks, are fully cross platform, can be used from Delphi, C++Builder and Lazarus and most spectacularly can be used to create web applications with TMS WEB Core. Read more about FNC for the web here.

TMS FNC Controls can be simultaneously used on these frameworks:


TMS FNC Controls can be simultaneously used on these operating systems/browsers:


TMS FNC Controls can be simultaneously used on these IDE's:


What's new in TMS FNC UI Pack v2.3:

TMS FNC Object Inspector

This is a versatile Object Inspector control. The control fully utilizes RTTI to provide a properties view of all properties of an associated component. Property filtering is possible to show only a select number of properties of a control. Moreover, when connected to a dataset, it will allow immediate viewing and editing of all fields in the associated dataset.


  • Automatic retrieval of published properties of an object
  • Various inplace editors such as a combobox for enum values, or checkgroup dropdown picker for set properties.
  • Events for customization, filtering of properties and property values
  • Can handle class properties, collection properties, set properties ...
  • Datasource support for direct data editing

TTMSFNCTaskDialog

Supercharge your message boxes with the TTMSFNCTaskDialog that is modeled after the task dialog that was introduced in newer Windows operating system versions. The task dialog message can contain HTML formatted text, optional text, radio group based options and much more...


  • HTML formatted texts for content, expandable text and footer
  • Optional radio buttons, progress bar, verify checkbox, input field, and custom input
  • Custom buttons with the option to turn them into command links
  • Auto close after timeout

TTMSFNCStatusBar

  • Various panel styles including HTML formatted text, images, progress bar and more
  • Optional auto size, button and hint per panel
  • Multiple progress bar levelst

TTMSFNCSignatureCapture

Allow the end user to draw a signature on touch screens and the component can capture this signature either as image file or as scaleable vector data.


  • Save signature to a file, memory stream or an image
  • Load signature from a file or memory stream
  • Customizable pen, clear icon and text

TTMSFNCColorWheel

End user selection of the full RGB color range is possible with the new TTMSFNCColorWheel.


  • Separate R, G, B and HEX values
  • Used in TTMSFNCColorPicker/TTMSFNCColorSelector as a mode

All users with an active registration for TMS FNC UI Pack can now obtain the new update free and get started to build fantastic applications for Windows, Web, mobile, Linux or macOS.
A fully functional trial version of TMS FNC UI Pack is available and even in combination with a TMS WEB Core trial, it can be used to explore the fascinating new & never seen before capabilities to use these UI controls also in web applications.
Or you can even explore the components directly via your browser by checking the TMS WEB Core demos that have several FNC control demos.

We hope you're as passionate about FNC UI controls as our team is and we're eager to learn what more UI controls you would like to see coming in future updates or what features or improvements you would like to see added to the existing controls! Be in touch, talk with our engineers and let's keep the interesting technical conversations going!

FREE TMS WEB Core event @London Oct 23, 2018

$
0
0


Thanks to Jason Chapman and the UK DevGroup of enthusiast Delphi developers, we have been able to cooperate and organise a TMS WEB Core event in London on October 23, 2018!

Bruno Fierens, CTO of tmssoftware.com will personally come to present TMS WEB Core, give live demonstrations, explain the architecture, show a glimpse of future developments and answer all your questions and listen to your suggestions and feedback.

The event is FREE and we welcome UK Dev Group members, existing TMS software customers and future TMS software customers interested in doing modern web application development in their beloved Object Pascal language and from the beloved Delphi IDE.

The TMS WEB Core event

Sessions are presented by
  • Bruno Fierens, CTO of tmssoftware.com
  • Jason Chapman

Location of the event:

The Prince Albert, 163 Royal College Street, London, NW1 0SG


The agenda of the day:

Time Description Speaker
12:00 Introduction UK devgroup + event Jason Chapman
12:15 TMS Company organisation & product line overview Bruno Fierens
12:30 Break/Lunch  
13:00 TMS WEB Core architecture in-depth Bruno Fierens
13:45 TMS WEB Core architecture hands-on / live demos Bruno Fierens
14:30 Break  
15:00 Connecting from TMS WEB Core to the back-end Wagner Landgraf (online) / Bruno Fierens
16:00 Hands-on experience with TMS WEB Core Jason Chapman
16:30 Q&A Bruno Fierens / Jason Chapman
17:00 End of TMS WEB Core event  


Registrations

The number of places is strictly limited to 30, so be fast to sign-up as we cannot go over the limit of the venue.
To register, please use the following online form

REGISTRATION FORM


We look forward to see you there.
Don't hesitate to contact us if you have any questions regarding the TMS WEB Core event in London or TMS WEB Core in general.

Visiting the TMS lab day 1: TMS WEB Core support for Google charts

$
0
0


Two weeks of TMS lab visits

From today till October 12, we'll have a daily visit in the TMS lab to see what the team is working on, experimenting with, researching... for future TMS WEB Core releases. For some of this work, there are already firm plans for adding this to upcoming releases, for other more exploratory research work, this is not set in stone yet. But we wanted to take you on this visit to the TMS lab to let you see future capabilities and features and get in touch to listen what you look most forward to, to hear where your needs are, so we can align our efforts best to your needs.

Lab visit 1: Google Charts integration

On this first day, we are having a look at where we are with support for Google Charts. Google Charts is an extensive web charts library consisting of a huge range of chart types for integration into your web applications.


We have been researching how we could best enable the integration of Google Charts in TMS WEB Core applications from the perspective of a Delphi developer used to OO component based RAD development. From this, we deducted, we'd need to create a Google Charts component that can be dropped on the form and that gives you the desired chart by just setting a few properties and call methods to add the actual chart data, all in 100% Pascal code.

Setting up a series in a Google Charts becomes with the help of the TWebGoogleChart component as easy & intuitive for Delphi developers as:

uses
  WEBLib.GoogleChart;

var
  it: TGoogleChartSerieItem;
begin
  WebGoogleChart1.BeginUpdate;

  WebGoogleChart1.Title := 'Browser Market Share';

  it := WebGoogleChart1.Series.Add;

  it.ChartType := gctPie;
  it.Title := 'September 2018';

  it.Values.AddPiePoint(60.3, 'Chrome');
  it.Values.AddPiePoint(13.1, 'Safari');
  // extract this pie out of the pie chart 
  it.Values.AddPiePoint(7.2, 'Firefox', 0.4);
  it.Values.AddPiePoint(6.7, 'IE/Edge');
  it.Values.AddPiePoint(3.1, 'Opera');
  it.Values.AddPiePoint(9.6, 'Other');
  WebGoogleChart1.EndUpdate;
end;


Adding other chart types such as line, bar, OHLC, area, ... is very similar. Google Charts features such as chart animation, curved lines, legend, ... are equally easily enabled.

For interaction with the chart, a component event such as OnSelect() is exposed for the TWebGoogleChart component. Here we can display the value of the clicked chart part via:

procedure TForm1.WebGoogleChart1Select(Sender: TObject;
  Event: TGoogleChartSelectEventArgs);
var
  chart: TWebGoogleChart;
begin
  chart := (Sender as TWebGoogleChart);

  lbSelect.Caption := chart.Series[Event.SerieIndex].Title + ' '
      + chart.Series[Event.SerieIndex].Values[Event.PointIndex].DataPoint.Title + ': '
      + FloatToStr(chart.Series[Event.SerieIndex].Values[Event.PointIndex].DataPoint.X) + '%';
end;


Thanks to the power of TMS WEB Core, we can easily embed a sample Google Charts based TMS WEB Core application here in this blog:


or you can visit this demo full page on this page

Today we have in the lab most Google Charts types supported and we're working on the last finishing touches to make the component as intuitive as possible for a Delphi developer while at the same time allowing to take advantage of the vast range of features offered in Google Charts. The end result should empower Delphi developers to create web applications with on-the-fly flexible & feature-rich chart reporting.

Lab visit feedback & win!

Our team loves to hear what you think about what is brewing in the lab, how you plan to use the upcoming features, what priority our team should give to it and if you have possibly interesting and/or creative ideas to make this even more powerful for Delphi developers. To reward your interaction & feedback, we'll pick 3 blog comments on October 15 that we liked the most and first prize is a free TMS WEB Core license, the 2nd and 3rd prize is a 50% discount coupon on TMS WEB Core. Let yourself hear to increase your chances!

Get started

Meanwhile, you can go ahead and explore the new & exciting territories of web client development that become available for Delphi developers with TMS WEB Core! You can download the trial version that is generally available, go ahead with the standalone version you purchased or with TMS WEB Core and additional tools that are all included in TMS ALL-ACCESS. Note also that in October, you can still take advantage of purchasing TMS WEB Core at launch price from 295EUR for a single developer license. From Nov 1, regular pricing will be active on TMS WEB Core (395EUR for a single developer license).


Visiting the TMS lab day 2: Adding artificial intelligence to TMS WEB Core apps

$
0
0


There is no doubt about it that artificial intelligence is a hot topic. Wondering how this cool technology could be used by Delphi developers creating web applications, we researched how we could leverage existing technology. In the area of artificial intelligence, the Tensorflow.js library is one of the most popular and powerful libraries for use in web clients. So, we embarked on investigating how we could enable using TensorFlow.js easily from our beloved Pascal language in a TMS WEB Core web client application.

First sample: sequential prediction

This first small sample is based on creating first a model with sample data ourselves and then let the machine predict a value based on the model. The model is simply a series of points (X,Y values). After we feed the point data into the model, it is up to the model to predict the next point on a line.

In Pascal, this translates to using a class TTMSTFPredictSequentialNext that internally uses the Tensorflow model tf.keras.models.Sequential. This is made available as a TComponent with following public interface:

  TTMSTFPredictSequentialNext = class(TComponent)
  public 
    procedure createModelWithSample(xs, ys: TJSArray);
    function predictYforX(aValue: JSValue): JSValue;
  end;

To feed the model with sample data, a Javascript array of X values and Y values is created, initialized with the dots clicked on the user-interface in a TWebPaintBox. Drawing the dot on the TWebPaintBox is just like a Delphi developer would do this for years with the TCanvas in a TPaintbox:
procedure TForm2.DrawDot(X, Y: Integer);
begin
  WebPaintBox1.Canvas.Brush.Style := bsSolid;
  WebPaintBox1.Canvas.Brush.Color := clRed;
  WebPaintBox1.Canvas.Pen.Style := psSolid;
  WebPaintBox1.Canvas.Pen.Width := 2;
  WebPaintBox1.Canvas.Pen.color := clRed;
  WebPaintBox1.Canvas.Ellipse(X-4, Y-4, X+4, Y+4);
end;
Note that the Sequential model expects normalized data. This means that we need to normalize the pixel coordinates into the 0..1 space, meaning the minimum X value translates to 0, the maximum X value to 1.

Initialize the model
var
  xs,ys: TJSArray;
begin
  tfModel := TTMSTFPredictSequentialNext.create;
  xs := TJSArray.New;
  ys := TJSArray.New;

  FillData(xs, ys);
  NormalizeData(xs, ys);
  tfModel.createModelWithSample(xs, ys);
end;
Getting the predicted value

Note that here we of course need to first normalize the X value, i.e. convert it to the range 0..1 where 0 is the minimum X value and 1 is the maximum X value. The predicted Y value is normalized as well, so here we need to denormalize it, i.e. convert the value between 0..1 back to Y pixel coordinates based on the minimum and maximum Y value.
var
  predictY: single;
  X,Y: integer;
begin
  X := LastPointX + 50;
  predictY := tfModel.predictYforX(normalize(X)));
  y := denormalize(predictY);
end;


This is a sample prediction:


or you can discover how this works by directly using the online TMS WEB Core demo.

Second sample: digit identification

In the second sample, we show how existing model data can be loaded in the TensorFlow model and can be used to identify a drawn number. The model data is taken from a Tensorflow example using a MNIST database. It is loaded into the model with:
  tfModel := TTMSTFDigitIdentifier.Create;
When the model is initialized, we can load the sample data:

  tfModel.loadModelFromUrl('ModelJs/model.json');
We then allow to draw a number with the mouse on a TWebPaintBox:
procedure TForm2.WebPaintBox1MouseDown(Sender: TObject; Button: TMouseButton;
  Shift: TShiftState; X, Y: Integer);
begin
  doPaint := true;
  remX := X;
  remY := Y;
end;

procedure TForm2.WebPaintBox1MouseMove(Sender: TObject; Shift: TShiftState; X,
  Y: Integer);
begin
  if doPaint then
  begin
    WebPaintBox1.Canvas.Pen.Width := 30;
    WebPaintBox1.Canvas.Pen.Color := colorStroke;
    WebPaintBox1.Canvas.MoveTo(X, Y);
    WebPaintBox1.Canvas.LineTo(X + 30, Y);
    remX := X;
    remY := Y;
  end;
end;

procedure TForm2.WebPaintBox1MouseUp(Sender: TObject; Button: TMouseButton;
  Shift: TShiftState; X, Y: Integer);
begin
  doPaint := false;
end;


The next step is to get the image data from the TWebPaintBox, normalize its size, i.e. reduce it to a 28x28 image and call the method model.IdentifyDigit() to let the identification happen. This identifyDigit() method expects the image data as type JSImageData, defined in Pascal as TJSImageData. When it is recognized, IdentifyDigit returns a number from 0 to 9, when not, it returns -1. The returned value is set as caption of a panel.

The code used is:
var
  ImgData: TJSImageData;
  v: JSValue;
begin
  ImgData := normalizeddigit.Canvas.Context.getImageData(0, 0, 28, 28);
  v := tfModel.identifyDigit(x);
  if v = -1 then
    pnlDigit.Caption := '?'
  else
    pnlDigit.Caption := Format('%d', [v]);
end;
You can experiment with the model and code yourself by opening the TMS WEB Core web client app we created for this digit identifying app using the TensorFlow library.


Summary

The area of artificial intelligence is big. Different problems require different models and different approaches. We just presented two small samples here, but it is clear that much more can be done, not only with TensorFlow but also with other libraries. In our lab, we did the experimental work to use this in a convenient way from our beloved Pascal language for these two samples, but clearly, there is still quite some work ahead to expose all capabilities as convenient to use Pascal classes. We're curious and very interested to hear what AI problems you might want to solve and thus, with what priority and on what we should focus first.

Lab visit feedback & win!

Our team loves to hear what you think about what is brewing in the lab, how you plan to use the upcoming features, what priority our team should give to it and if you have possibly interesting and/or creative ideas to make this even more powerful for Delphi developers. To reward your interaction & feedback, we'll pick 3 blog comments on October 15 that we liked the most and first prize is a free TMS WEB Core license, the 2nd and 3rd prize is a 50% discount coupon on TMS WEB Core. Let yourself hear to increase your chances!

Meanwhile, you can go ahead and explore the new & exciting territories of web client development that become available for Delphi developers with TMS WEB Core! You can download the trial version that is generally available, go ahead with the standalone version you purchased or with TMS WEB Core and additional tools that are all included in TMS ALL-ACCESS. Note also that in October, you can still take advantage of purchasing TMS WEB Core at launch price from 295EUR for a single developer license. From Nov 1, regular pricing will be active on TMS WEB Core (395EUR for a single developer license).

Visiting the TMS lab day 3: ExtJS & TMS WEB Core

$
0
0


The fact that IDERA acquired the company Sencha behind the ExtJS framework and has now both Embarcadero and Sencha under its umbrella generated also some interest among Delphi developers for this framework. From time to time we get a request if the ExtJS framework can be used from TMS WEB Core. This triggered our team to investigate if this was technically feasible. And after the needed research, we are happy to inform that we managed to integrate a couple of ExtJS controls as proof of concept in TMS WEB Core. Technically this means that we can:

  1. Create the ExtJS control from a Pascal class
  2. Manage the ExtJS control settings via the Pascal class properties
  3. Map class methods on ExtJS control functions
  4. Catch the events triggered by the ExtJS control and route these to the Pascal class events

If this can be technically achieved for one ExtJS control, it typically means that this can be achieved for the full set of ExtJS controls. Further things that are nice to have but need deeper research are: control the ExtJS layouting setup from the Delphi form designer and use the TDataSource & TDataSet based data-binding mechanism also for ExtJS controls like the ExtJS grid.

With what could we better demonstrate this than with the Fishfact dataset, that wonderful dataset we all learned about and loved when it was demonstrated the first time by David Intersimone in 1995 with Borland's Delphi 1.

Here are some nostalgic pictures of these great days:


Back to 2018 though, where we have an ExtJS button, ExtJS label and an ExtJS grid on the Delphi form designer in the Delphi 10.2.3 Tokyo IDE:


When dropped on the form, from the ExtJS button OnClick event handler, the Fishfact dataset in JSON format is loaded in the ExtJS grid with the code:

WebEXTJsGrid1.ConnectToJSONUrl('http://www.tmssoftware.biz/tmsweb/fishfacti2.json');
This dataset contains the image URLs to the Fishfact fish images and these are rendered automatically in the ExtJS grid. At runtime, this becomes in the browser

Or of course, you can directly play with this prototype application here live from our website

Summary

ExtJS is a rich JavaScrpt framework with a large set of UI controls. Similar to the ability to use jQuery controls from TMS WEB Core, with some effort, it is also possible to integrate the ExtJS framework with TMS WEB Core. To make it really user-friendly, it is quite some work though to create well-designed Pascal wrapper classes to make the framework and its controls convenient to use from the 100% Pascal based TMS WEB Core framework. We love to hear your voice and your thoughts how much priority we should give to bring integration of the full ExtJS framework in TMS WEB Core. You, the user of TMS WEB Core are behind the steering wheel of the TMS WEB Core Mille Miglia route from Brescia to Rome and back to Brescia.

You can determine with your vote in what city along our route, you wish to see full ExtJS support.

Lab visit feedback & win!

Our team loves to hear what you think about what is brewing in the lab, how you plan to use the upcoming features, what priority our team should give to it and if you have possibly interesting and/or creative ideas to make this even more powerful for Delphi developers. To reward your interaction & feedback, we'll pick 3 blog comments on October 15 that we liked the most and first prize is a free TMS WEB Core license, the 2nd and 3rd prize is a 50% discount coupon on TMS WEB Core. Let yourself hear to increase your chances!

Get started

Meanwhile, you can go ahead and explore the new & exciting territories of web client development that become available for Delphi developers with TMS WEB Core! You can download the trial version that is generally available, go ahead with the standalone version you purchased or with TMS WEB Core and additional tools that are all included in TMS ALL-ACCESS. Or you can come to see TMS WEB Core and discover and discuss it face to face with Bruno Fierens of tmssoftware.com showing it in London on October 23, 2018. Note also that in October, you can still take advantage of purchasing TMS WEB Core at launch price from 295EUR for a single developer license. From Nov 1, regular pricing will be active on TMS WEB Core (395EUR for a single developer license).

Visiting the TMS lab day 4: TMS WEB Core from Lazarus

$
0
0


It is nice there is also free open-source IDE for Pascal developers, but what is really nice is that this free IDE runs on multiple operating systems. It can be natively run from Windows, macOS and Linux. And yes, Raspbian being in the Linux family, Lazarus also runs on Raspbian on a Raspberry Pi!

So, of course, our team was challenged to research if we could also have TMS WEB Core running on Lazarus and with this, eventually allow Pascal developers to build web client applications from their beloved operating system, whatever that is.

Our team already has extensive experience with building components for Lazarus, as our FNC range of components already all support Lazarus on all target operating systems, Windows, macOS, Linux. But building the kind of IDE integration that something like TMS WEB Core needs is a higher level of complexity.

The good news is that after a lot of investigation and effort, we have a first prototype of TMS WEB Core running in Lazarus (on Windows). This means you can:

  • Create a new TMS WEB Core application type from Lazarus
  • Add TMS WEB Core UI controls on the form
  • Use the Lazarus code editor to write the application code
  • Press F9 and the TMS WEB Core application gets compiled & launched in the browser
  • Debugging is done from the browser (when desired also directly at Pascal code level) as it is for Delphi

So, obviously in the Lazarus, this means we have:

  1. The new TMS WEB Core project type that can be chosen:


  2. The default TMS WEB Core project now looks like this in the Project Inspector:


  3. Under Tools, Options, there is a new tab for setting the TMS WEB Core configuration:


  4. On the tool palette, the large number of TMS WEB Core controls show up:


  5. And of course, the TMS FNC UI controls are also available and ready to be used for TMS WEB Core applications:


Putting a first Lazarus based TMS WEB Core application together

Having this, writing TMS WEB Core applications from Lazarus is very similar to writing these from the Delphi IDE. Here we have the Lazarus form designer, added a button and a grid to the form:


And then we wrote following code to load JSON data (the Fishfact dataset, what else?) into the grid and an event handler for the grid to show the image URLs in the Fishfact dataset as images instead of URL text:

procedure TForm1.WebButton2Click(Sender: TObject);
begin
  WebStringGrid1.DefaultRowheight := 64;
  WebStringGrid1.RowHeights[0] := 24;
  WebStringGrid1.FixedCols := 0;
  WebStringGrid1.ColCount := 8;
  WebStringGrid1.ColWidths[6] := 128;
  WebStringGrid1.ColWidths[7] := 128;
  WebStringGrid1.Options := WebStringGrid1.Options + [goRowSelect];
  WebStringGrid1.loadfromjson('http://www.tmssoftware.biz/tmsweb/fishfacti2.json','ROW');
end;

procedure TForm1.WebStringGrid1GetCellChildren(Sender: TObject; ACol,
  ARow: integer; AField: TField; AValue: string; AElement: TJSHTMLElement);
var
 img: TJSHTMLImageElement;
begin
  if (ACol = WebStringGrid1.ColCount - 1) and (ARow > 0) then
  begin
    img := TJSHTMLImageElement(document.createElement('img'));
    img.src := AValue;
    img.style.setProperty('height','64px');
    AElement.innerHTML := '';
    AElement.appendChild(img);
  end;
end;

The result in the browser is:


Of course, we could do something very similar with a Bootstrap style controlled table control. The result looks like:


Conclusion

We're happy to have a proof of concept that shows technically it is perfectly possible to create a TMS WEB Core application from the Lazarus IDE (on Windows). It remains a proof of concept and to have a finished product, a lot more work must happen. After all, we spend almost a year on perfecting the Delphi IDE integration, so it's not realistic to expect we can finish this in a couple of weeks. What is on the todo list:

  1. Port the command-line tools used by TMS WEB Core to macOS & Linux
  2. Do more work on the integration of things like automatically adding JavaScript library references like we have in Delphi
  3. Implement the property editors for the Object Inspector for properties for selecting HTML elements & CSS class names
  4. Do a lot more polishing and fine-tuning
  5. Create a distribution with install steps

We are really eager to learn how much users are interested in TMS WEB Core for Lazarus as this will determine the priorities of our team in the coming months. Let your voice be heard!

Lab visit feedback & win!

Our team loves to hear what you think about what is brewing in the lab, how you plan to use the upcoming features, what priority our team should give to it and if you have possibly interesting and/or creative ideas to make this even more powerful for Delphi developers. To reward your interaction & feedback, we'll pick 3 blog comments on October 15 that we liked the most and first prize is a free TMS WEB Core license, the 2nd and 3rd prize is a 50% discount coupon on TMS WEB Core. Let yourself hear to increase your chances!

Meanwhile, you can go ahead and explore the new & exciting territories of web client development that become available for Delphi developers with TMS WEB Core! You can download the trial version that is generally available, go ahead with the standalone version you purchased or with TMS WEB Core and additional tools that are all included in TMS ALL-ACCESS. Note also that in October, you can still take advantage of purchasing TMS WEB Core at launch price from 295EUR for a single developer license. From Nov 1, regular pricing will be active on TMS WEB Core (395EUR for a single developer license).

Visiting the TMS lab: Week 1 in a nutshell

$
0
0


Two weeks of TMS lab visits

At the beginning of this week we announced that we will publish a series of blogs for the coming 2 weeks. Well the first week is over!

Each day we visited the TMS lab to see what the team is working on and what other plans we have for the future TMS WEB Core releases. Not only this, we also wanted to listen to YOU, as a TMS customer!
Are there things that you want our team to expand, new ideas you want to share or maybe you've just seen nice features and you want to congratulate us ....everything is appreciated!


The following topics were covered in week 1

    Lab visit 1: Google Charts integration

    To integrate Google Charts in TMS WEB Core applications, we'd need to create a Google Charts component that can be dropped on the form and that gives you the desired chart by just setting a few properties and call methods to add the actual chart data, all in 100% Pascal code.

  • Lab visit 2: Adding artificial intelligence to TMS WEB Core apps


    The Tensorflow.js library is one of the most powerful libraries for use in web clients.
    In our blog we presented two small samples, sequential prediction and digit identification, but it is clear that much more can be done, not only with TensorFlow but also with other libraries.

  • Lab visit 3: ExtJS & TMS WEB Core


    Our team was very curious to know if the ExtJS framework can be used from TMS WEB Core. After some research we can now say that TMS WEB Core can do the following:

    1. Create the ExtJS control from a Pascal class
    2. Manage the ExtJS control settings via the Pascal class properties
    3. Map class methods on ExtJS control functions
    4. Catch the events triggered by the ExtJS control and route these to the Pascal class events

  • Lab visit 4: TMS WEB Core from Lazarus


    Here we also have the long awaited (and requested) first prototype of TMS WEB Core running in Lazarus!
    This means we can now:

    1. Create a new TMS WEB Core application type from Lazarus
    2. Add TMS WEB Core UI controls on the form
    3. Use the Lazarus code editor to write the application code
    4. Press F9 and the TMS WEB Core application gets compiled & launched in the browser
    5. Debugging is done from the browser (when desired also directly at Pascal code level) as it is for Delphi

    Lab visit, feedback & win!

    Let's make WEB even more fun and exciting. Tell us about your favourite subject/blog and win a prize!
    Now it's your turn! Give our team a new challange, give your opinion on the topics covered in the blogs and share with us your creative ideas.

    To reward your interaction & feedback, we'll pick 3 blog comments on October 15 that we liked the most and first prize is a free TMS WEB Core license, the 2nd and 3rd prize is a 50% discount coupon on TMS WEB Core. Let yourself hear to increase your chances!

    Reminder

    Note: in October you can still take advantage of purchasing TMS WEB Core at launch price from 295EUR for a single developer license. From November 1, 2018 regular pricing will be active on TMS WEB Core (395EUR for a single developer license).

Visiting the TMS lab day 5: Using external classes in pas2js

$
0
0


For todays visit in the lab, we dive deep into the workings of the pas2js compiler. This technical article is therefore provided by Michael Van Canneyt, one of the two masterminds behind the pas2js compiler. Michael Van Canneyt has been involved in the Pascal language development community for over 20 years, wrote numerous articles, books, open-source Pascal projects, commercial Pascal based desktop and server applications and much more. In other words, a very highly respected Pascal language professional we have the honour to work with!

Using external classes in pas2js

Using Classes in Object Pascal goes without saying. JavaScript also has objects and classes - sort of. Meanwhile, the amount of JavaScript APIs and libraries dwarfs probably the amount of available libraries in any other language. So, the natural question is: how do we use all these native JavaScript objects and classes in Object Pascal as efficiently as possible?

One way would be to actually create classes in Object Pascal which mimic the classes in JavaScript, and use assembler blocks to access the fields and methods of the actual underlying object. This approach has the advantage that it allows you to reshape the native JavaScript object into something that is more pascal-friendly. Or, if you don’t like the API of a JavaScript object, this approach also allows you to create a better API. The disadvantage of this approach is that it requires a lot of work, code and is error prone.

Another approach is to let the compiler understand JavaScript classes: provide the compiler with an object pascal description of a JavaScript object, but without an implementation in pascal: an external class definition.

In essence, this is nothing more than an extension of the ‘external’ declaration that programmers have used for ages to access functions in a library. Nobody thinks twice when looking at the following external function declaration:

function CreateFile(lpFileName: LPCWSTR; dwDesiredAccess, 
wShareMode: DWORD; lpSecurityAttributes: PSecurityAttributes; dwCreationDisposition,
dwFlagsAndAttributes: DWORD; hTemplateFile: THandle): THandle; stdcall; external kernelbase name 'CreateFileW';  

Or, if you want, an extension of an ‘Interface’ for a COM or other object which you import using a type library:

IInterface = interface   ['{00000000-0000-0000-C000-000000000046}']   
function QueryInterface(const IID: TGUID; out Obj): HResult; stdcall;
function _AddRef: Integer; stdcall;
function _Release: Integer; stdcall;
end;

This is also an external definition: the compiler knows what methods to expect, and can generate code to call each of the methods. In Object pascal, you can add property definitions to an interface: this is actually a convenience feature for the pascal programmer, since COM by itself does not know properties. When reading or writing the property, the compiler just knows it must insert calls to the getter and setter methods of the interface.

So, extending this idea, it is only a natural extension to be able to say

TJSHTMLCollection = class external name 'HTMLCollection'  
private 
  FLength : NativeInt; external name 'length';  
public    
  function item(aIndex : Integer) : TJSNode;
  function namedItem(aName : string) : TJSNode;
  property Items[aIndex : Integer] : TJSNode read item; default;    
  property NamedItems[aName : String] : TJSNode read namedItem;
  property length : NativeInt Read FLength;  
end;
To let the compiler know that there exists a class called HTMLCollection in JavaScript, and that whenever we create an instance of TJSHTMLCollection, the compiler should actually generate the necessary code to create a HTMLCollection class.

A big advantage of using such an external class definition is that it is very efficient at runtime: the transpiled code emitted by the compiler will contain direct method calls for all methods of external classes, there will be no extra generated intermediate code or conversion code.
This means that writing

var
  a: TJSNode;  
begin
  a:=Coll[0];  
end;


Where Coll is of type TJSHTMLCollection presented above, will map directly on
{
    var a = null;
    a=Coll.item(0);
}


Which is about as efficient as it can get for transpiled code.

An external class definition is also easy to understand: the above does not really differ a lot from an interface definition. Any Object Pascal programmer will at a glance understand what API this class offers. The only new concept to grasp is the header:

TJSHTMLCollection = class external name 'HTMLCollection'


The external name ‘HTMLCollection’ is almost verbatim what one can find in a function definition when importing a function from an external library, only now applied to complete classes. One can also view it as an equivalent of the GUID identifier in an interface definition.

The example shows that array properties for external classes are supported, just as they are in interface declarations. It also shows how to declare a read-only field: JavaScript does not know properties as we know them in Object Pascal, but only knows fields. For JavaScript objects that are backed by some native API, these fields can be read-only. The ‘length’ field in the above JavaScript HTMLCollection object is an example. If we were to declare it as

TJSHTMLCollection = class external name 'HTMLCollection'
   length : NativeInt;
end;


The compiler would know there is a field length, but it would be read-write. Obviously, this is not good. Since we can declare read-only or write-only properties, their syntax is used to solve this problem:

TJSHTMLCollection = class external name 'HTMLCollection'
private
  FLength : NativeInt; external name 'length';
public
  property length : NativeInt read FLength;
end;


From this definition it is clear for the programmer that there is a read-only property length. At the same time compiler knows that when it needs to read the property, it can use the name ‘length’. Why this syntax and not introduce something else, for example:

TJSHTMLCollection = class external name 'HTMLCollection'
    length : NativeInt; ReadOnly;
end;


Besides the fact that we don’t want to pollute the language with too many keywords, the external syntax was needed anyway, for two reasons:
First, JavaScript allows field names to start with the $ character, so a syntax to be able to give a valid pascal name was needed. The ‘external name’ was again reused:

TSomeJavaScriptClass = class external name ‘SomeJSClass' 
  MetaField : NativeInt; external name ‘$metaField';
end;

This tells the compiler that there is a ‘MetaField’ field in pascal, but that the JavaScript name is $metaField. Secondly, some JavaScript identifiers are valid pascal keywords.

This can be solved using the & escape character:

TSomeJavascriptClass = class external name ‘SomeJSClass'
    &end : NativeInt;
end;

Or using the external name syntax:

TSomeJavascriptClass = class external name ‘SomeJSClass'
    _end : NativeInt; external name ‘end’
end;

The same 2 reasons for having the external syntax apply of course for methods as well.

There is a special use for the ‘external name’ construct, namely to allow using object properties. The following is valid javascript:

MyObj[SomeName]=123;
A JavaScript is also a named array of arbitrary JavaScript values. This is translated in the TJSObject class declaration as follows:

TJSObject = class external name 'Object'
private
  function GetProperties(Name: String): JSValue; external name '[]';
  procedure SetProperties(Name: String; const AValue: JSValue); external name '[]';
public
  property Properties[Name: String]: JSValue read GetProperties write SetProperties; default;
end;

The external name ‘[]’ incantation tells the compiler that this function or procedure is in fact an array property access. As a result the above statement syntax can be kept:
MyObj[SomeName] := 123;


The same construct can be found in the JavaScript Array object declaration of TJSArray, and several other object definitions.

The above highlights the possibilities of the external class syntax. This syntax is actually nothing new or invented specially for pas2js: the Free Pascal Java bytecode compiler uses the same syntax to import Java classes, and uses a similar syntax to import Objective C class definitions on Mac OS, thus giving the pascal programmer access to all the possibilities offered by the platform.

In order to access JavaScript APIs, it is necessary to create external object definitions. The pas2js RTL delivers such definitions: units JS and web consist almost entirely from external definitions. The same is true for library imports such as libjquery, webaudio and webbluetooth.

How to create such units ? Three possible approaches exist:

-Manually:
This is how the JS, Web and Libjquery units were made, based on official documentation, the object declarations were coded manually. Needless to say, this is a cumbersome and error-prone approach.

-If a WebIDL specification is available, the webidl2pas tool can be used
This is discussed below.

-Using the classtopas function
The classtopas function is a function in the class2pas unit. It comes in several forms:
function ClassToPas(Const aName : string; Obj: TJSObject; aAncestor : string = ''; recurse : Boolean = False): string;
function ClassToPas(Const aJSName,aPascalName : string; Obj: TJSObject; aAncestor : string = ''; recurse : Boolean = False): string;
procedure ClassToPas(Const aJSName,aPascalName,aAncestor : string; Obj: TJSObject; aDecl : TStrings; recurse : Boolean = False);

The meaning of these arguments is intuitively clear from their names.
How to use this function ?

Get a reference to an instance of the object you want to create a declaration for, and call the function or procedure.

The demos of the pas2js compiler show how to do this.

program democlasstopas;

uses Web,Classes, JS, class2pas, browserconsole;

procedure ShowRTLProps(aClassName,aJSClassName : String; O : TJSObject);  Var    S : TStrings;    I : Integer;    
begin
    S:=TStringList.Create;
    try
      ClassToPas(aClassName,aJSClassName,'',O,S);
      for I:=0 to S.Count-1 do
         Writeln(S[i]);
    finally
      S.Free;
    end;
end;

var
   o : TJSObject;    
begin
    // get the new JavaScript object:
asm
      $mod.o = new Ext.form.Panel;
end;
MaxConsoleLines:=5000;
ShowRTLProps('Ext.form.Panel','TExtJSForm',o);  end.


Combine this with the following HTML page:


<!DOCTYPE html>  
<html>   
<head>   
<meta charset="utf-8"/>   
<script type="text/javascript" src="https://cdnjs.cloudflare.com/ajax/libs/extjs/6.0.0/ext-all.js"></script>   
<script type="application/javascript" src="democlasstopas.js"></script>    
</head>    
<body>   
<script type="application/javascript">    rtl.run();   
</script>   
</body>  
</html>


Will result in the following output when the page is opened in the browser:


The declaration is far from perfect: it still needs a lot of manual tweaking. The argument types of functions are unknown (if they are declared at all) the return types too. Objects do not have an actual type other than the TJSObject.

But it is a start, and it should be easy to create a program that allows you to enter a class name in an edit box, and which outputs a class declaration in a memo.

It should be clear that the ClassToPas function is limited. However, if you are lucky, a WebIDL file exists for the API you are trying to access. WebIDL is a standard of sorts to describe Javascript APIS: https://www.w3.org/TR/WebIDL-1/ Version 2 is in preparation on https://heycam.github.io/webidl/

If such an IDL exists you can use the webidl2pas tool. This is a commandline tool (it could easily be converted to a GUI tool) which takes as input a WebIDL file, and outputs a pascal file with external class definitions.

Basically, this means that the command webidl2pas -i webaudio.idl -o webaudio.pas

Will create a unit webaudio.pas from the input file webaudio.idl. The output can be tweaked somewhat, the command webidl2pas -h or webidl2pas --help will give an overview of all available options.

Using these tools, there is no excuse for not exploiting the many Javascript libraries out there in your next TMS Web Core project!

Thanks Michael Van Canneyt for this excellent article with many very interesting insights!

Viewing all 1008 articles
Browse latest View live